

A while back I ran a series here on my blog, Six Days of Speedlite Tips.
I have put all the tips together in one post in preparation for my November 4th NY Model Shoot/Workshop.
Speedlites will be only one of the lighting sources we use. Dave Piazza from Westcott is bringing Spider Lights and strobes for the photographers to use.
We still have room for a few photographers.
Below are are models for the shoot. Three models, three sets ups, three instructors, 18 photographers - and one heck of a cool location.

Okay, on with the tips.

Because some folks are just starting out, I thought it would be a good idea to share with you my Basic Studio and On-Location Speedlite Setup.
But first, here's a practical tip: If you want a dramatic portrait, don't light the entire subject. Use shadows to add a sense of drama to portrait.
Here's a look at the gear I recommend for setting up a basic studio/on-location speedlite setup.
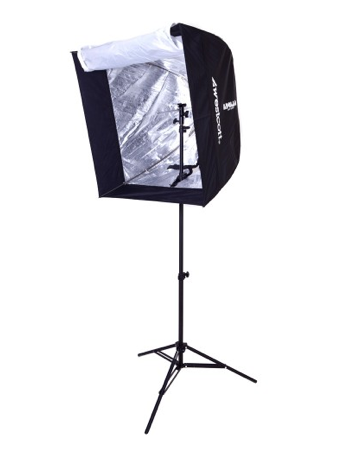
Westcott Apollo Softbox kit - for shaping the light for an individual portrait.
Westcott Grid for Apollo softbox - for shaping the light even more.
Westcott Orb Speedlite kit - for softer, wrap-around lighting and for small groups.
Westcott 6-in-1 Reflector/Diffuser kit - bounce a speedlite into a reflector or fire it through a diffuser for a larger light source: the larger the light, the softer the light.
Honl Gel kit - for adding color to the light.
Honl Grid - for shaping the light from a speedlite.
Honl Speed Strap - for attaching grids and gels to your speedlite.
Westcott Black Cloth backdrop - for low key portraits.
Westcott White Cloth backdrop - for high key portraits.
If you are in the market for a Canon speedlite system, here are my recos:
Canon 600EX-RT Speedlite
Canon ST-E3 Speedlite Transmitter
For serious shooters, I recommend shooting tethered using the Tether Tools kit.
If you like on-line learning, check out my Kelby Training on-line classes. Master composition and learn how to see the light.
• • • • •
"The Doorhof is always open." Translation: My friend and fellow Kelby Training instructor Frank Doorhof is always available to share how-to photo info with photographers around the world.
What's more, Frank's door – literally – is always open. He invited me into his studio in Holland last year for a cool studio shoot.
Frank is an expert on speedlites, so he was a natural choice as a guest blogger for my 6-day speedlite series. Scroll down for previous tips in this series.
Take it away, Frank.
Small flash : How to make a difference and maximize results.
When my friend Rick asked me to give a quick tip on small flash, it did not take me long to come up with an idea to share with you guys.
We all know the problem: You're on a location and everything goes as planned. You shoot the stuff your client wants and you all go home happy. But how often does it happen that afterward, your client says something like, "You know, the look is great but . . . ."
Well, the following tip will make sure that this problem is solved before it happens. It may also give you more revenue from your shoots.
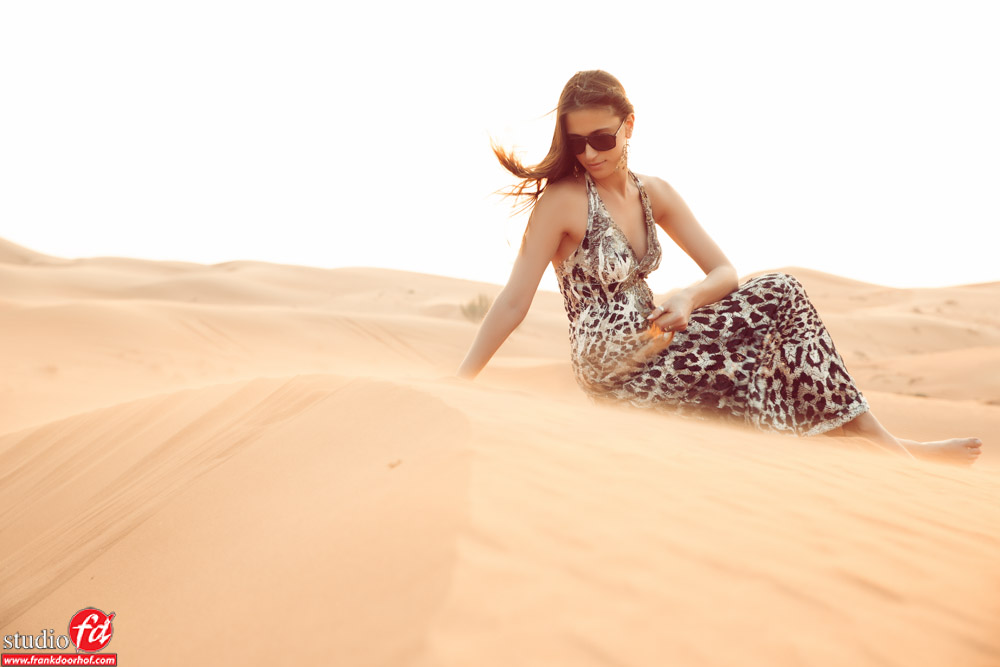
When shooting on location, always make sure that you deliver two series of pictures: one with speedlites and one with only the natural light. That way, you can deliver two different looks for the price of one. Even if your client says that he/she only wants the strobe versions, just do it anyway because sometimes it's not only the on-site client that makes the final decision.
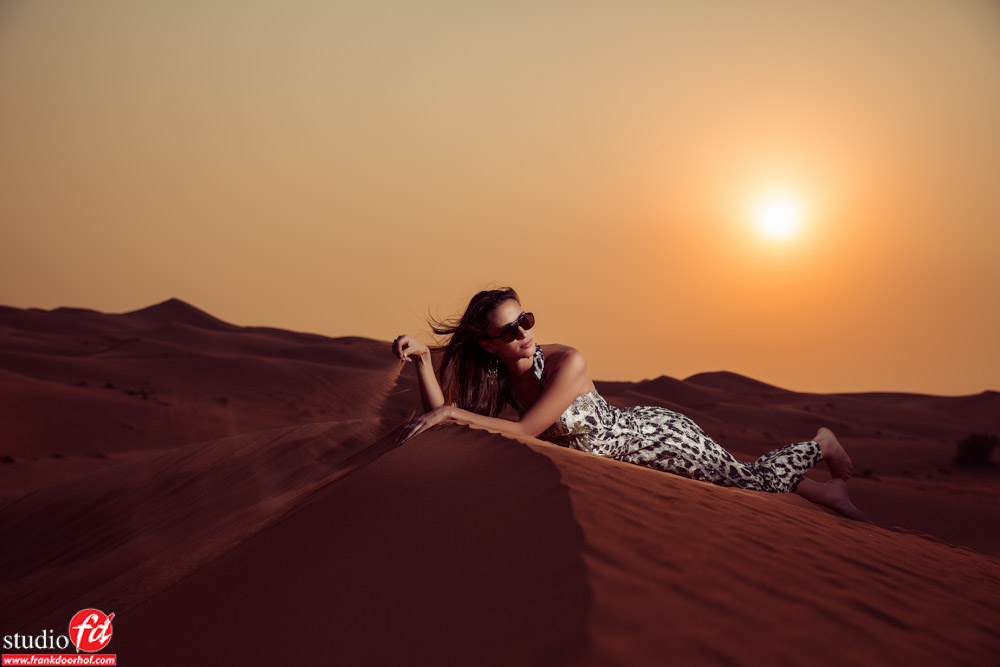
The first image in this post was taken with only natural light, and the other two were made using two Canon speedlites. We used two strobes stacked with Rogue Flash Benders from ExpoImaging to light the model.
I set my speedlites to HSS (High Speed Sync) to fight the super bright ambient light – and to get a moody, almost fairytale atmosphere in the photographs. By stacking the two strobes, I got an increase of one stop of light output, which was not really needed here, but with two strobes, the recycling time is much faster, and the batteries last longer.

Now most of you (including Rick "Mr. Canon E-TTL" Sammon) know that I almost always use light meters. One of the biggest things you can learn you about using light meters is to know when you need them and when not. In this case, I wanted results quick and very variable, because the window of time to shoot this was really limited, so I used manual mode on the camera and E-TTL on the strobes. Annewiek (my wife) was holding the strobes and walked around the model, changing the position of the strobes for different takes.
I knew I only wanted to use two-three shots from this location, so I wanted to maximize my photo choices. To meter everything after each change would limit my time, so in this case E-TTL rocked. However, it's not perfect or consistent, but because you're not shooting a series in a single location and you want to maximize the results, it's a great option to use.
For more photography tips, please visit my web site. While you are there, please check out my instructional dowloads. And remember, the Doorhof is always open.
• • • • •
Today's tips: Light the background . . . add a pattern to the background . . . change the color of the background. Have fun!
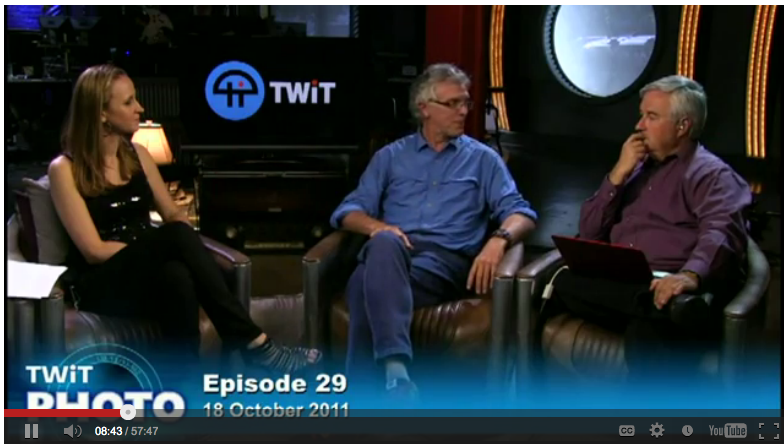
Watch the video, which was recorded in the TWiP studio with my friends Catherine Hall and Leo Laporte. Good fun - and good info. My segment starts about 23 minutes into the show.
The show was recorded a few years before I switched to Squarespace for my .com site.
If you like on-line learning, check out my Kelby Training on-line classes. Master composition and learn how to see the light.
Accessories used for this shoot:
- Honl Gel Kit. Lets you add color to the light from your speedlite.
- Honl 1/8" Grid. Lets you focus the light.
- Tether Tools Essentials Pack. Hooks up your camera to your computer.
- My custom cardboard light modifier. :-)
My lens for this shoot: Canon 24-105mm IS lens, which I use for most of my photography.
• • • • •

Today's tip: Use your speedlite for wildlife photography.
Concept: Balance the light from the speedlite to the natural light - so your photograph is a combination of both natural light and the light from your speedlite. Here's how to do it:
1) Set your camera to the Manual Exposure mode.
2) Adjust the aperture/shutter speed combination for a correct exposure.
3) Don't set a shutter speed higher than 1/200th of a sec. (max synch speed of most cameras).
3a) Setting a faster shutter speed is possible if you have high-synch speed capability.
4) Turn on your flash and set it to E-TTL.
5) Adjust the +/- setting until your subject is correctly exposed.
With this simple technique, it's possible to control the brightness of the subject and background independently, which is kinda cool.
In very bright conditions, start by setting a low ISO. If your flash does not illuminate a distant subject, you may need to boost your ISO.
Using a flash accessory such as the Better Beamer will extend the maximum illumination distance of your speedlite.
For more detailed lighting tips, see my Apps.
• • • • •

Today's tip: Create Terrific Top Light.
Concept: Position the light directly above the subject. Use "voice activated" light stands to save on real light stands. Use a softbox with a recessed diffusion panel to soften and direct the light. Moving the softbox a few inches can dramatically change where the shadows fall and how much of your subject is illuminated. I talk more about shadows (and light) in my Kelby Training class: Light - the main element in every photograph. Info on my On-line Classes page.
Recommended Gear:
Canon 5D Mark III
Canon 24-105mm IS lens
Westcott Apollo Softbox kit
Canon 600EX-RT Speedlite
Canon ST-E3 Speedlite Transmitter
Tether Tools kit.
• • • • •
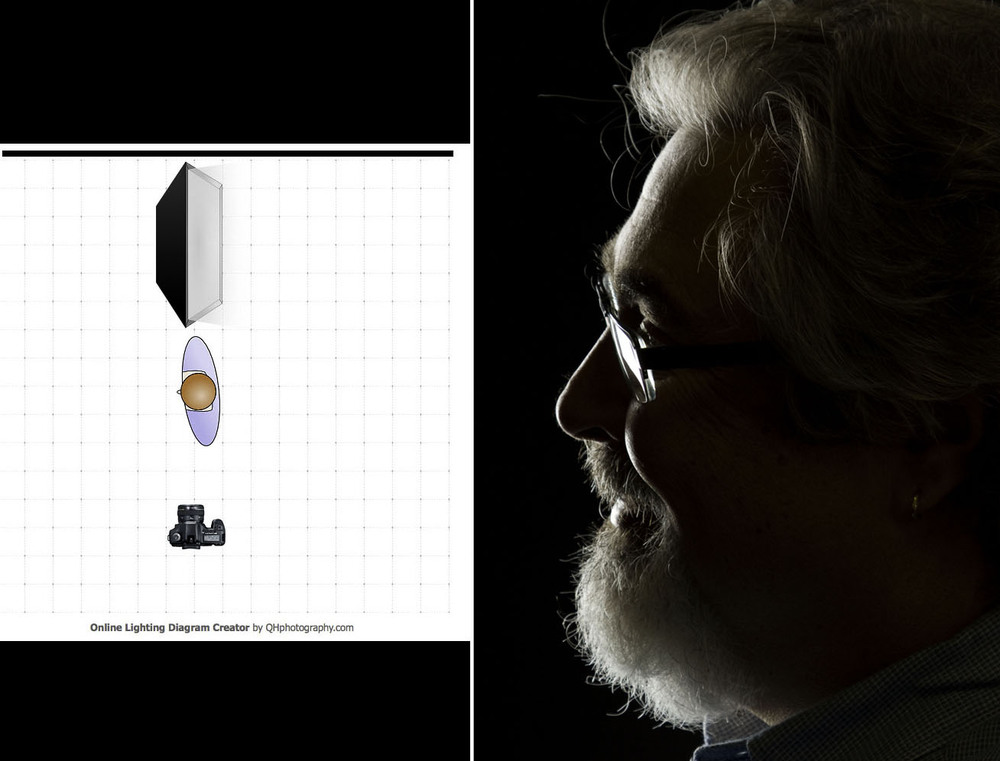
Today's tip: Create Cool Rim Light.
Concept: Position the subject slightly in front of the soft box. Have the subject look straight ahead (in the
opposite direction in which the softbox is facing) so you get a
profile. Basically, you want the light coming from slightly in front of
and behind the subject. If that's confusion, simply see the above diagram.
You
need to experiment with subject position and flash output to get the
shot you want. I always shoot on E-TTL and vary the light output with my
wireless transmitter, but you can control that in camera, too.
BTW: A softbox with a recessed front diffusion panel is a very important accessory for this technique. It allows you to control the light to a greater degree than an umbrella or an octodome.
Recommended Gear:
Canon 5D Mark III
Canon 24-105mm IS lens
Westcott Apollo Softbox kit
Canon 600EX-RT Speedlite
Canon ST-E3 Speedlite Transmitter
Tether Tools kit.
For more detailed lighting tips, see my Apps. For hands-on learning, check out my workshops.
If you like stuff like this, you can subscribe to my blog here.
Explore the light,
Rick
This post sponsored by Westcott. Check 'em out for all your lighting needs.
