

Rick, a special thanks once again for allowing me to share some of my photographic passion with your audience.
Let’s try something a little different this time!
With the weather in the northern hemisphere starting to gradually warm up, more photo opportunities start to emerge.
For many of us, finding time to shoot has to fit around work and family commitments – so – why not combine shooting with some of your family time? If you’re looking for a good family fun event that also provides a great photo experience, checkout your local air shows.
Never photographed an airshow before? No worries, these quick tips will get you up and started in no time!
It’s a fact of airshows, they almost always occur at midday – so you just have to make due with the available lighting conditions. There are some tricks to help even up the odds a bit.
Shoot close. Even with aerial shots, start to zoom in closer as you become more comfortable. Look for arrivals (morning) and departures (evening). Most of the aircraft will not be based at that particular airport – so they have to arrive and leave, including aircraft that will just be on display and not scheduled to fly. Some great opportunities here with better light! Dusk or night shows. Some shows will have a special twilight or night performance the Friday before the main show. This is a great time to get creative with some really cool shots!

Practice your panning techniques. The main show area (called “the box”) will have most of the acts crossing right in front of you so panning is critical. Keep these tips in mind:
Panning with most things is not consistent. The apparent speed of the approaching aircraft appears to be slow, but will quickly increase as it approaches your center point. Prepare for this or the plane will start to exit the front of your frame before you realize it. Once you know the direction of a run, point your torso in the direction of the last picture you expect to make in that series. Now turn at the waist to the starting point. This will allow your waist to return to a natural front-facing posture as the aircraft exits. This will also make it easier to keep up with the apparent speed increase mentioned above.
Camera settings are pretty straight forward, but here are a couple tips to get started: Shooting modes are a personal preference, but I’ll shoot on shutter priority (or manual) as I want to match my shutter to the type of aircraft (more on that in a minute) Don’t shoot with too low of an aperture setting, especially if you are photographing multiple aircraft at once. f/8 is my absolute minimum and I prefer f/11. You’ll need the depth of field. “Hold the hammer down.” Set your camera to continuous focus and multiple shots.

An airshow doesn’t mean all you have to shoot is aircraft. Make sure to get some behind the scene shots, especially of the pilots and demonstration teams. I love the expression on the Golden Knight parachutist in the image above as he interacts with his fans!
It may not always be easy, but see about special photographer access.
Many shows will have “photo pits” available and these are usually located right up front at show center. Especially at the smaller shows, inquire about any needs they may have for event photography. It never hurts to ask – and won’t you be surprised if you end up in air with one of the performing acts!
Leave the plane “room to fly in to”. Just as with other types of photography, try not to butt the subject up against the frame in the direction of its motion – give it some space.
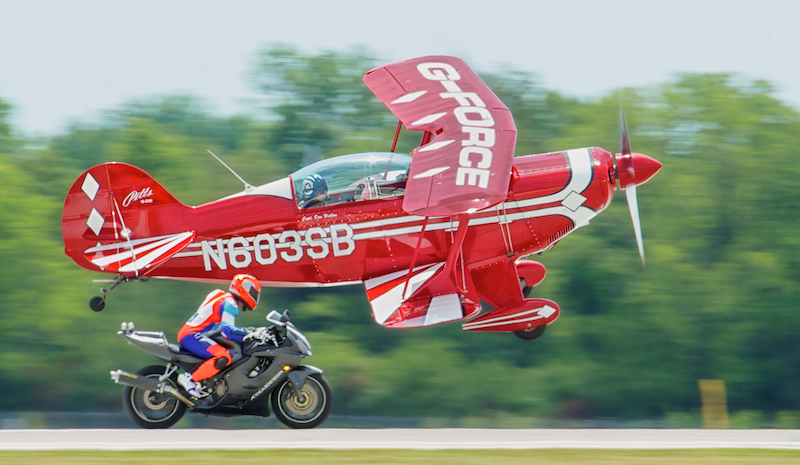
Make sure you have some “prop blur” on propeller driven aircraft. A propeller that is “frozen” makes the aircraft look frozen.
This is a hard technique to nail down as your stability and panning technique needs to be almost perfect, but the outcome is worth the effort. Generally speaking, some of the smaller acrobatic planes will start to pickup some good blur around 1/500th of a second (1/350th is better). Larger or more powerful aircraft are harder, 1/250th is needed to begin to pickup good prop blur and 1/90th of a second will get you that “perfect” 360 degree prop blur. The Mustang above was shot at 1/160th of a second – traveling at over 300 MPH!

A strong sense of motion helps whenever possible, so keep your shutter speed as low as you feel comfortable with, even on jets. The more motion you can pickup around the aircraft (clouds, trees, buildings, other airplanes) the better your image will appear.
Static displays. All shows that are airport based will have plenty of aircraft on display. These are great photo opportunities and usually include some interior opportunities – a great time for a little hand held HDR!
Know what’s coming next, and from where. All shows will give you the radio frequency of the “air boss” and the show teams. This allows you to know which part of the act is up next and from which direction it will be approaching. Don’t have a radio setup? No problem, most shows will let you rent them for the day.
One of the things I love best about photography is the ability to combine it with just about any other interest my family has. It’s a great way to spend time with friends and family while still indulging your photographic gene!
Stay in focus, and visit with me on: Soaringart.com.
Mark
• • • • •
This post sponsored by x-rite. X-Rite is the global leader in color science and technology. The Company develops, manufactures, markets and supports innovative color solutions through measurement systems, software, color standards and services.
Check out these cool x-rite products:
ColorMunki
Passport Color Checker
