Westcott

Six Days of Speedlite Tips: Day 1

© Rick Sammon

It's Day 1 of my Six Days of Speedlite Shooting tips.

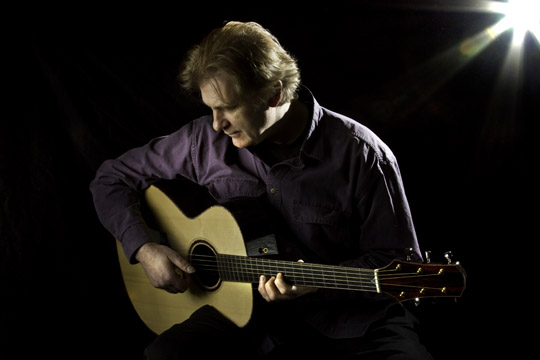
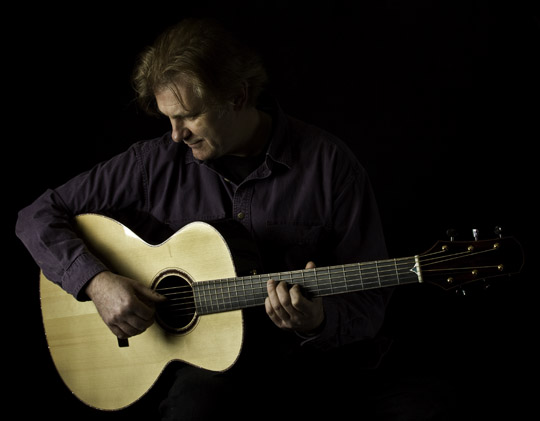
Today's tip: Create Cool Rim Light.

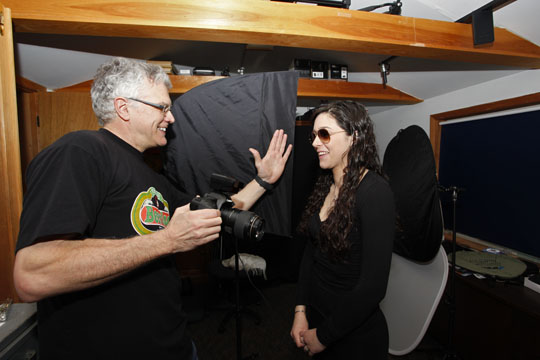
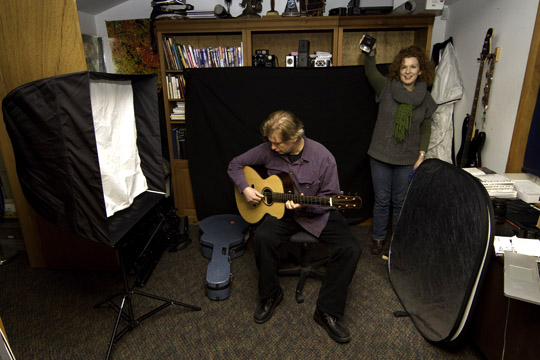
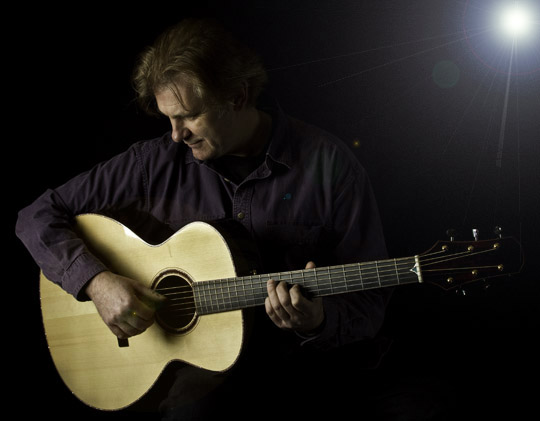
Concept: Position the subject slightly in front of a softbox, as illustrated above. Photograph the subject looking straight ahead (in the opposite direction in which the softbox is facing) so you get a profile. Basically, you want the light coming from slightly in front of and behind the subject.

In the shot above, I am positioning the model. For the end-result shot, I was positioned to the model's left side.

You need to experiment with subject position and flash output to get the shot you want.

BTW: A softbox is a very important accessory. It allows you to control the light to a greater degree than an umbrella or an octodome. More on that in future posts.

Gear:

Canon 5D Mark II

Canon 24-105mm IS Lens

Westcott Apollo Softbox

Canon STE-2

Tether Tools Table

Tether Tools Cable

Note: The Canon ST-E2 is designed for indoor, line of sight use - although it's worked for me even when speedlites are "hidden" in a soft box. Another option for wireless flash photography are 

Pocket Wizards

. You need both a transmitter and receiver.

For more detailed lighting tips,

see my apps

.

For hand-on learning, check out

my workshops

.

Explore the light,

Rick

P.S. Here is a link to a post on 

Plug-ins for Portraits.

 Check it out.

Quick Speedlite Tip: Put the Flash In the Picture


I'm writing a post on the new Canon 600-EX Speedlite - and came across this older post that I though you might enjoy in the meantime.


My friend Peter Calo, a super talented musician and composer, called yesterday and said that he could use a nice portrait of himself for the Tippin Guitar web site. If you don't know Tippin guitars, click here. The guitars are amazing - sound, look, feel and design.


Peter wanted a shot of him playing guitar - like a live-on-stage shot. He told me that the guitar had to look good - the hero of the picture (as we use to say when I worked in advertising). I said sure.

So, not having a studio, I set up one Westcott Apollo soft box in my office. Inside was a Canon 580EX II Speedlite.


On the opposite side of the softbox was a reflector, which I used to bounce the light of the softbox onto the shadow side of Peter's face. Without the reflector, the shadow was too harsh.


As you can see, the softbox is not pointed directly at Peter. Rather, it is pointed in front of him. This "feathers" the light for a soft and pleasing effect.

Tip: The larger the light, the softer the the light; the closer the light, the softer the light.

In the opening shot for this post, Peter's wife, Marianne, held another Canon Speedlite for a hair light. For a cool effect, I directed Mary Ann to hold the flash so that I could see it in the very corner of the frame. For the second shot, no hair light was used.

Both speedlites, on E-TLL, where fired with my Canon ST-E2 Wireless transmitter.


Of course, if you have Photoshop, you can simulate the flash being in the scene by using the Lens Flare filter. See below


I shot all the pictures with my Canon 7D and 24-105mm IS lens - my favorite lens for portraits.


Before Peter and Mary Ann arrived, I shot a few tests. Above is a shot in which I placed another Canon Speedlite behind me for a background/separation light. I used an orange gel on the flash to warm up the background. Peter liked the shot, but he chose the "cooler" look of the black background. 

So my friends, most of the time, it's a good idea to keep the flash out of the frame, but there are exceptions. 


I run Master Your Flash workshops here in Croton on Hudson, NY. I hope you can join the Speedlite fun.


Explore the light,
Rick 


P.S. I have been playing guitar since Woodstock. Not fun getting old. But the good news is that I am still that kid at heart. Plus, now I can play 13th chords! Me: on hood with afro.


Day One At Dave's: One Light Wonders

© Rick Sammon
Day one of my workshop at the Dave Cross Studio in Oldsmar, Florida was a blast! I had eight students learning the benefits of shooting with one light source: speedlite in a Westcott Apollo softbox.

The image was taken with my Canon 5D Mark II and Canon 25-105mm IS lens. I had my Canon 580EX II placed in the Westoctt soft box. Click here to see all my gear.


Above:  Kathy Porupski was our voice activated light stand for the shoot. Kathy also helped with the model. Thanks Kathy!


Above: Your full-service instructor at work. Thanks Jason Ludwig for the nice behind-the-scenes image.

To the students: You all did a great job!

Stay tuned for more images from the workshop.

Explore the light,
Rick

P.S. For more lighting tips, see my apps.

Florida Photo Caravan: South Beach – Final Shoot

Photograph by Rick Sammon
We just finished the final shoot on my Florida Photo Caravan. We had some fantastic models and talked about controlling the light and making pictures.

For the opening image for this post, we bounced the light from our on-camera flashes (set on TTL) into a Westcott reflector – after setting our cameras to Manual and setting the exposure for the light coming through the window behind our model.

For the two pictures below, we bounced the sunlight, which was coming from above and behind the lifeguard stand on which the model was standing, onto her face and body – again using a Westcott reflector.

Photograph by Rick Sammon

Photograph Rick Sammon

Reflectors rock.


I took all of these pictures with my Canon 5D Mark II and Canon 25-105mm IS lens.

We are setting the dates for our 2012 Florida Photo Caravan  - and Delray Goes Digital project. Interested? Shoot me an email at ricksammon@mac.com.

Explore the light,
Rick

Be My Guest Monday 12/13/10: Vered Koshlano

It's "Be My Guest Monday," the day of the week that's turned over to a talented guest blogger for a quick tip.

Today's guest: Vered Koshlano


It's all yours, Vered.

I recently posted a photo challenge on my blog. I posted the above photograph and asked the reader: "What was the background material I used for the photograph?"

Now, before you read further, look at the photograph and take a few guesses.

My readers came up with the most wonderful and surprising ideas.

If you haven't guessed, it is a piece of inexpensive fabric - the kind with many small shiny discs sewn into it.

When you angle a piece of fabric like this toward the camera (meaning not directly parallel to camera's sensor plane). and have the light skim past it, rather than light it directly, you get a nice effect of beautifully-illuminated little discs. Then, all you have to do is put the background out of focus (use a telephoto lens and wide aperture) and you get that beautiful bokeh effect.

The photo was taken with my Canon 1Ds ll and a three light setup - one large Westscott soft box with a Dynalite head on camera left. That light illuminated the model's face from above eye-level (look in her eyes, you can see it).

I used a second light with a 20-degree honey comb grid on camera right, lighting the model's hair. I placed a third light with barn doors (to control spill) behind her head. That light is skimming across the fabric in the background.

I have discovered a treasure in the form of fabric stores. Look for what's on sale and imaging the fabric illuminated with colored gels. Get large pieces for a full backgrounds, or just remnants as props (art supply stores are another great resource).

My website has many examples of creative and simple "inexpensive" accessories that are readily available.

Enjoy!

Vered Koshlano