Try Topaz DeNoise: A noise-cancelling plug-in

rick sammon 3.jpg

I'm on the plane (again!!), playing with plug-ins in Photoshop, while wearing my noise-cancelling headphones. Ahhhh, the peace and quite. 

As you may know, noise-cancelling headphones don't totally cancel all noise. They reduce noise, to different degrees, depending on the noise level and your definition of noise. A baby crying, for example, is not considered noise. :-)

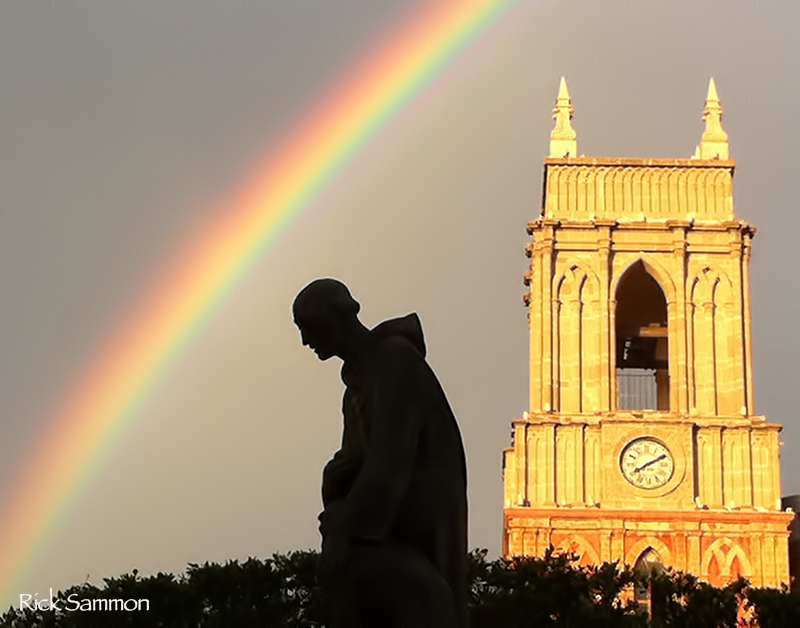
While thinking of noise, I opened a picture that I took with an early iPhone in San Miguel de Allende, Mexico. That image, with a fair amount of noise, is below.

rick sammon 1.jpg

To cancel the noise (actually greatly reduce the noise), I used Topaz DeNoise. I first used the sliders on the left to select the amount/type of noise to reduce. Then I used the slider on the right to fine-tune the noise reduction, in particular, in the shadow and highlight areas . . . somewhat independently.

By the way: all images have noise, even images shot at ISO 100 on a sunny day. 

Screen Shot 2013-09-29 at 8.57.03 AM.png

The result of using Topaz DeNoise is the image that opens this post. As you can see, the noise is greatly reduced.

Topaz DeNoise is only one of the plug-ins I suggest to my workshop students who want to improve their images. All the plug-ins I use are listed on my Save On Plug-ins page.

Explore the light,
Rick

Today's Awesome Guest Blogger: Steve Casey

Image_1_Final_Processed.jpg

One of the cool things about leading digital photography workshops is that I get to meet some awesome photographers - and to learn from them. Steve Casey, a talented photographer from Las Vegas, Nevada, is one such individual.

After seeing the opening image for this post in the group slide show at the end of our Oregon Coast workshop, I asked Steve to share his processing technique.  

Take it away Steve! 

A big “Thank You” to Alex Morley and Rick and Susan Sammon, for a wonderful photo workshop experience on the dramatically beautiful Oregon Coast. Living in Las Vegas, I tend to focus my photography on the mountains and deserts of the west. This workshop was an opportunity to visit a new photographic environment.

Opening image: One of my favorite images was made at the beach below Haceta Head Lighthouse near Florence, Oregon. We arrived on the beach in time to evaluate the scene for a sunset shoot. The tide was out, which allowed us to walk a good distance out toward the water and get a better perspective of Haceta Head Lighthouse.  Reflections were provided by waves retreating back out to sea after advancing around and beyond our feet and tripod legs. The setting sun highlighted the mist raised by the breeze and the crashing surf. A great number and variety of seabirds were evident on the sea stacks.  Smaller groups would gather to feed at the water’s edge. It was a wonderful atmosphere and picturesque scene.

Image_2_Original.jpg

Above: My original capture was exposed for the highlights and provided enough detail in the darks.  My first step in processing was to Enable Profile Corrections in Lightroom’s “Lens Corrections” in the Develop Module. No other Lightroom adjustments were needed, so I opened the file in Photoshop. My goal was to render this scene as I remembered it in my mind. To do so, I decided to use Viveza and Color Efex Pro 4 from the NIK Collection. In Viveza I made minimal adjustments to Contrast, Saturation, Structure, Shadow Adjustments, and Warmth.

Image_3_After_Viveza.jpg

Above: To increase the strength of the lighthouse, the light on the bluff below the lighthouse, the sky, clouds, mist, reflections, and bring some detail to the shadowed sea stacks, I employed multiple filters in Color Efex Pro 4. Detail Extractor was used at a low strength. 0% Opacity control points were placed in the sky and clouds to maintain their softness. The Sunlight Filter brought out the backlighting from the setting sun in the wave mist.  It also highlighted the clouds and reflections while adding to the overall soft look with detail that I desired. Darken/Lighten Center was placed to help draw the viewer’s eye to the lighthouse and sunset light on the bluff.  In the same effort, Tonal Contrast was used to further increase detail – 0% Opacity control points minimized the effect in the sky and clouds.

The final steps were targeted to specific parts of the image. A Tony Kuyper Luminosity Masked Curves Layer was used to bring the highlights down. Painting a Dodge/Burn Layer at low opacity brightened the lighthouse. A Hue/Saturation Layer reduced the luminosity of the sky and added a small amount of warmth. In the end, I was pleased that the image represented my memory of this special visit.

IMAGE_4_Moon Set.jpg
Above: We were fortunate to revisit this same location the next evening.  The tide was still out.  Clouds were few and far between. Another lesson in the need to capture a location when you see it - it is unlikely to ever be the same again. While the time before the sunset was not as impressive as the first evening, the moon set presented another opportunity.  A truly beautiful location that I am very fortunate to have visited.

Those interested, may view more of my images on my web site.

Thanks again Alex, Rick and Susan. 

Day 7: Seven Days of Sunrise/Sunset Photography Tips

13 copy.jpg

To celebrate the release of my Photo Sundial app, which runs on the iPhone and the iPad,  I am running a series here on my blog: Seven Days of Sunrise/Sunset Photography Tips. Each day I'll share two tips from the Gallery section of the app, for a total of 14 images. Check out all the images in the app, which is on sale until September 30th.

Today is Day 7.

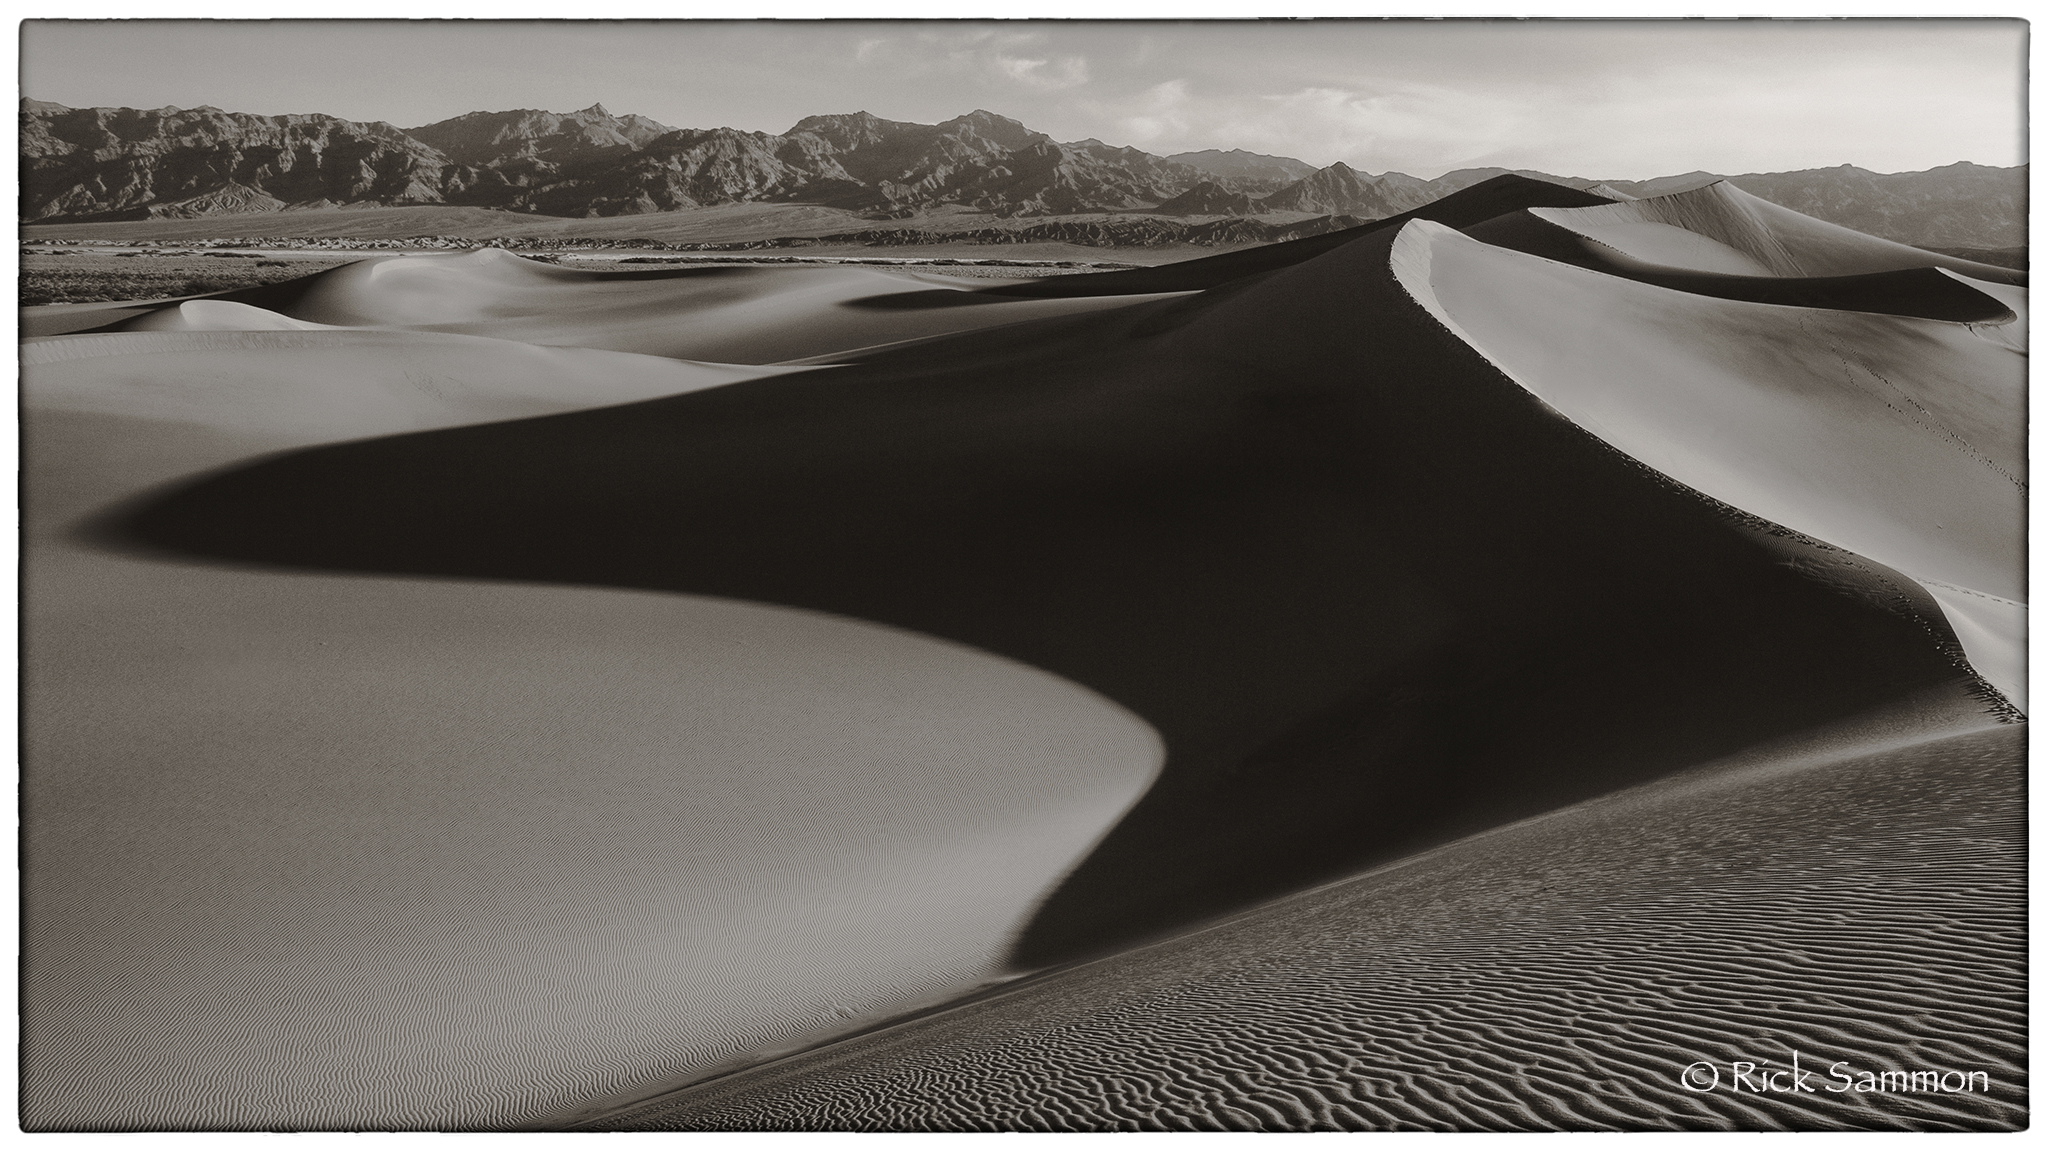
Go for Black-and-White. Strong shadows at sunrise and sunset help to produce dramatic images. Those strong shadows can look even more dramatic in a black-and-white photograph. Remember: light illuminates, shadows define. Topaz Black-and-White Effects and Nik Silver Efex Pro are the two plug-ins I use to create my black-and-white images. Location: Death Valley, California. FYI: I'm doing a workshop in Death Valley in 2014. Info on my 2014 Workshops page.

14 copy.jpg

Adjust Your Exposure. As the sunrises and sunsets, your exposure will be constantly changing – quickly. Keep checking your pictures on your camera’s LCD monitor to make sure you are getting good exposure. Remember: your histogram is your camera's light meter.

new main.jpg

Read more about Photo Sundial - the app that helps you find the position of the sun so you can make awesome images - and much, much more.

Explore the light,
Rick