

First, thank you very much to Rick for allowing me to do a guest post on his blog. Both Rick and I will be presenting at this year’s Out of Chicago Summer Conference, being held from June 24-26, 2016.
Most portrait photographers reach for their 85mm or 105mm lens when heading out on a shoot. These focal lengths give a nice, pleasing, realistic look to the subjects. Personally, I rarely use them. I prefer creating wide-angle portraits that have a surreal look to them.
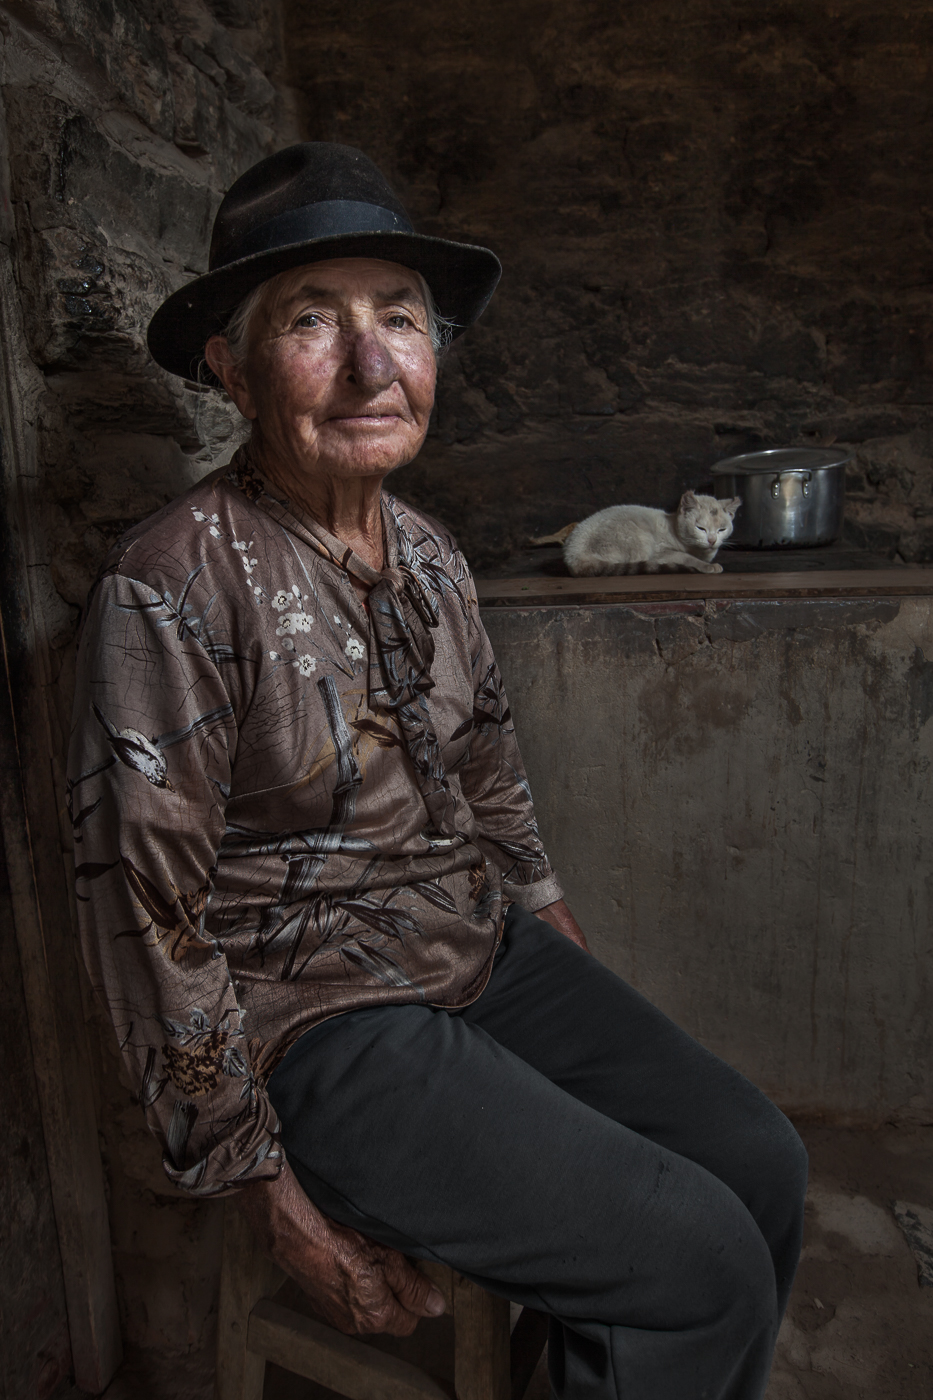
My basic formula for capturing portraits is to choose a compelling subject, complementary (or at least non-distracting) background, shoot wide, get close, get the hands in the frame, and use a mix of natural light with some minimal diffused flash lighting.
Once I have the image captured, I use a variety of post-processing techniques to create a “stylized” final product. Although my post-processing techniques are beyond the scope of this article, here is how I capture my wide-angle portraits:
Find a compelling subject
Obviously, everyone is unique and has some compelling qualities about them. With that said, I look for exceptional subjects that have a particularly interesting quality and look like they have “experienced life”. I like photographing older people for that reason. I also enjoy photographing children.
Looking at the portrait of the Indonesian dockworker at the top of this page, notice what an incredible subject he is. In fact, this guy is so good that you really have to be talented to get a bad picture of him. On the contrary, it is pretty easy to take a bad picture of me. You could spend all day taking pictures of me in front of old wooden ships and you will not get as good of a picture as I did spending 20 minutes photographing this guy. In this type of portraiture, your choice of subject is critically important.
Shoot in front of a complementary, non-distracting background

Insert Photo 2
Part of capturing emotion in my subjects is avoiding having elements in the picture that distract from them. When shooting wide-angle, you need to pay extra attention to this. When I am looking through the camera at the beginning of the session, it is typically with the background in mind.
The usual suspects for distracting elements include trees behind the head, straight lines or shapes that capture attention, bright lights, colorful objects and garbage on the ground. If the sky is bright and cloudless, then I generally keep the sky out of the image.
The above picture of the gentleman in front of the red shipping container falls into the non-distracting background category. He is essentially standing in front of a wall.
The image below, however, is a great example of a complementary background. This is why I love shooting in places like rural Asia. Some of these villages have incredible opportunities for backgrounds that you just don’t get in Naperville, Illinois.

One important note that also ties into the next section . . . the lighting you are shooting in is critical for creating a non-distracting background. Nothing is more distracting than hot spots and shadows all over your scene. Shoot either early or late in the day (when the sun is low in the sky) or in overcast conditions. For my portraits, I actually prefer overcast conditions. This is because I like to be in a good landscape location for sunrise and sunset and often shoot my portraits during the day.
Use lighting that flatters your subject
I use flash for 90% of my portraits. I find that using artificial lighting is often one of the final frontiers for photographers, because it can be intimidating and confusing. If you have been holding off on learning it, you’ll find that it is easier than you think.
Because I carry everything with me, I go pretty basic on lighting… just a single flash with an umbrella or softbox in most cases. I try to get a decent balance of natural and artificial light and avoid putting too much flash on the subject. Putting too much flash on a person is the easiest way to ruin the shot.
My method is pretty simple. I’ll discuss more in the next section, but I first get an exposure for the background, leaving the flash off and underexposing the background slightly. I then turn on the flash and concentrate on getting the right amount of flash on the subject. You want to make it look like no flash was used, but you want your subject to be brighter than the underexposed background.
Most of these images were shot using just one off-camera flash at a 45-degree angle to the subject, about 2 feet (slightly over ½ a meter) away and higher than their heads and angled down.
Camera and flash settings

I always shoot portrait sessions in manual mode. As mentioned, I first get my exposure correct for the background, without adding flash. If the session is outdoors, I usually start with my camera set to ISO 100, f/7.1 and a shutter speed of around 1/160. I then make the necessary adjustments to get a slightly underexposed background, generally around 0.5 stop, but 1 stop at most. For indoors, I start with a higher ISO
I also shoot with my off-camera flash on manual mode. You will want to overpower the existing lighting conditions a bit. On my Canon flash(es), I’ll often start with settings of 1/16 when outdoors, or much less if I’ve increased my ISO considerably. If the subject looks like they are being hit with flash too hard (they would look like they have been copied and pasted in), then I back off until the subject stands out, but you can’t easily tell that I’ve used flash.
Shoot wide, get close
I should say shoot “somewhat” wide because I generally shoot at around 24 mm and usually no wider. I find that focal length is a good balance of the reality you get at 50mm and the distortion you get with an ultra wide-angle lens.
Because I am shooting wide, I get quite close to my subjects and warn them ahead of time about this. For me, the eyes are a critically important part of the picture and must be very sharp. I focus on the closest eye and re-focus frequently as I move around the subject.
Posing and positioning
I often begin sessions by showing my volunteer subjects some final, processed images I have taken of other people. This almost always peaks their interest and gives them an understanding of what I am looking for.
If I am in a foreign country and I am being translated, I ask my local guide to chat with the subjects during the session. This helps put them at ease and results in a natural expression.
I generally ask the subject to look directly at the camera and not to smile, although not always. I then start moving slightly left or right, asking them to keep their head still and just follow the camera with their eyes. I find that this often results in a more interesting look. I usually shoot from slightly below eye level. If the subject is standing at an angle, I have them put their weight on the back foot.

I like to include the subject’s hands in the composition. With a wide-angle lens, their hands in the foreground will look large, so I try to strike a balance with the hands being prominent but not too large. Or, the arms can be folded (with one or both hands visible) and the arms used to form a nice frame around the bottom of the subject.
Post-processing
As mentioned, my post-processing techniques are beyond the scope of this article. However, getting things right in the camera is the critical first step.
You can find Ken Koskela’s work at: