

Today I had a chance to enhance (after jamming with workshop student Chuck Pierce) a few more of my images from my recent NYC model/lighting workshop. Check out my previous post to read about the awesome workshop.
My idea for the images in this post was to remove some of the reality from the files to create more creative and artistic images.
Opening image: I was envisioning a painterly look for my portrait of model Minyoung Cheong. To reach that goal, I shot a three-image bracketed set of pictures with my Canon 5D Mark III and processed the files in Photomatix. Yes, the in-camera HDR (a JPEG) looked good, but I wanted more control over my HDR image, so I used Photomatix.
If you don't have Photomatix, give it a try. You will find that it is the most powerful and creative HDR program out there. Why? Because these guys invented HDR software. Get a discount on Photomatix on my Save on Plug-ins page.
After creating what I call my HDR negative, I cropped and straightened my image, played around with the Pastel Filter in Nik Color Efex Pro, applied selective saturation, and did some burning and dodging.
Quick tip: Remember that light illuminates; shadows define - and that shadows are the soul of the photograph.
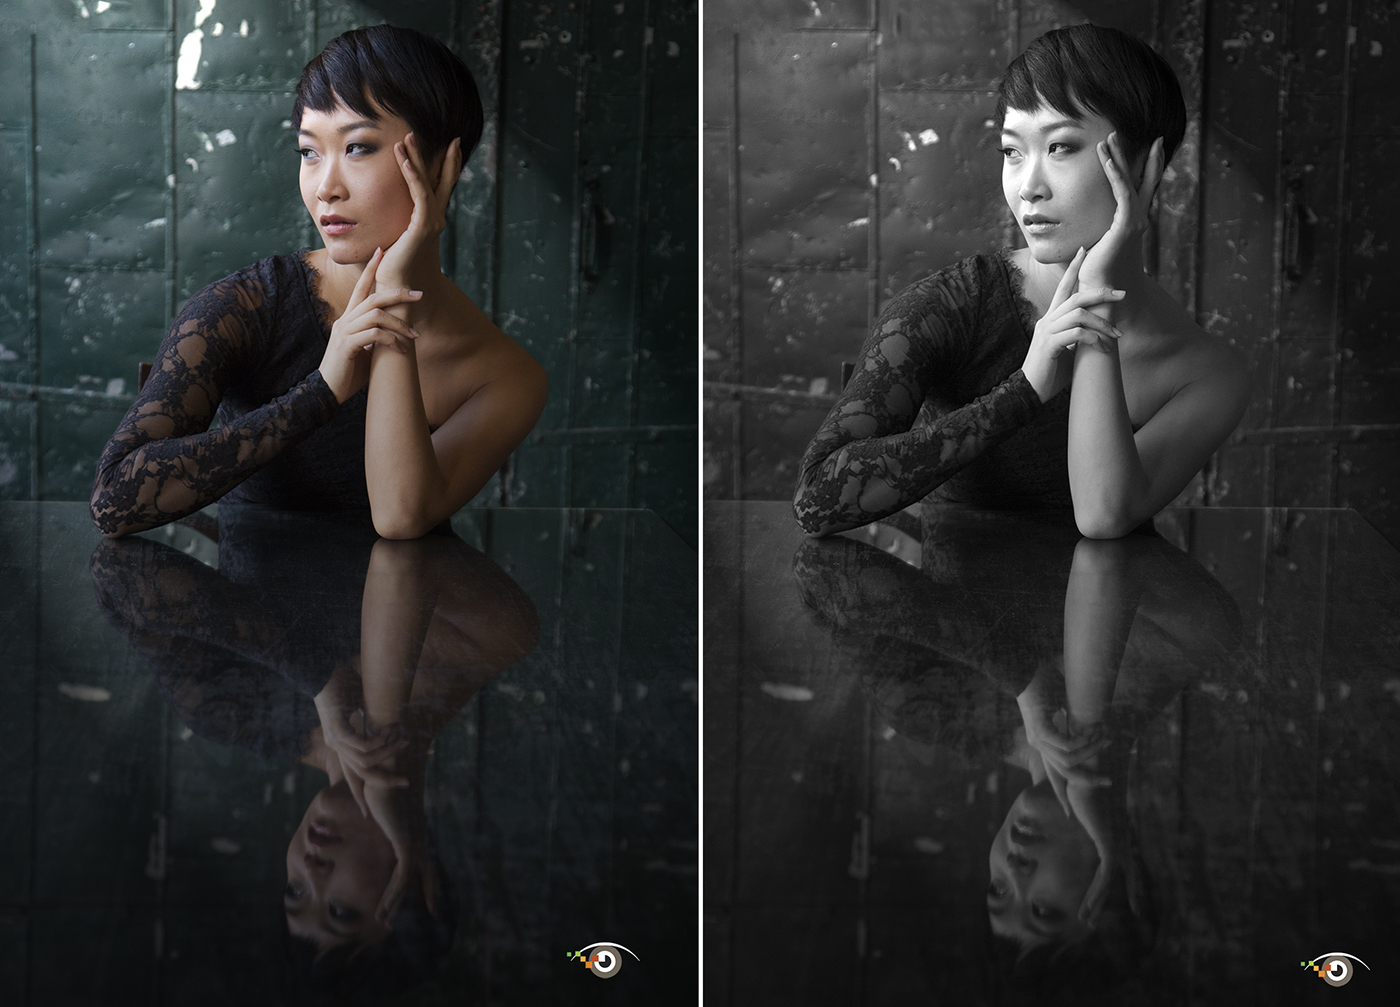
Above: While "reflecting" on the awesome workshop, I started to play with this image of Minyoung. After converting it to black-and-white with onOne software's Perfect Black-and-White Premium 9 (also listed on my Plug-ins page), I used the Render Lighting Effects in Photoshop to mold and shape the light around the subject.
By the way, this is a natural, window light photograph.
Quick tip: Use reflections to add interest to your photograph.

Above: Here are two more of my favorite photographs from the shoot. Westcott Rapid Box Duos were used to illuminate our beautiful model with beautiful light.
Quick tip: The background can make or break a shot . . . which is why we chose the Metropolitan Building as our workshop location.
Quick tip: If you want an interesting/dramatic portrait, don't light the subject's entire face.

Above: These stacked, old trunks made a perfect background for our model, Tanya S. Our lighting: Westcott Spiderlight TD6 Daylight and 36x48-inch Shallow Softbox – combined with a TD6 in a Westcott 12x36 Strip Bank with Egg Crate Fabric Grid. To change the mood/feeling of the scene, I used the Polaroid effect in Nik Color Efex Pro.
Quick Tip: Use plug-ins to change the mood/feeling of a photograph.

Above: That's Westcott's Dave Piazza in the background checking the lighting . . . I think. ;-)
Thanks again to my fellow instructors, Dave Piazza and Joe Brady, for making the event a success. And thank you Adorama and Westscott for sponsoring the workshop.
I loved the group of 12 photographers, too!
I hope to see you on a 2015 workshop. All are welcome!
Explore the light,
Rick