| Photograph by TreyRatcliff |
It's Round 1 of the week-long Battle of the HDR Photo Tips: Trey Ratcliff vs. Rick Sammon. Thank you for joining us ringside.
Trey Ratcliff is some dude on the internet that runs Stuck in Customs. His mom visits his blog every day. If people leave bad comments, then his mom gets 'em.
Rick Sammon was at Woodstock and still tries to maintain the PLJ feeling of the '60s. He also scuba dived in Lake Baikal, Sibera – where he photographed the nerpa.
Here we go:
Ratcliff: When I give these tips, just imagine a Michael-Weston-voice over.
Sometimes, when you’re out shooting, it’s best to plan to improvise. You gotta have a plan, but you also need to think back on our feet. Many photographers (myself included) have an introverted side, where you kind of feel comfortable blending into the background, quietly making magic through your lens… but that won’t help you change your future when opportunity arises spontaneously
As an HDR photographer, I am intimately aware of “HDR situations” — those times when there is more light than my camera can handle. This was one of those situations. I had already scouted the entire island of Ibiza, and I knew where the sun was setting and it’s relative location to landmarks of interest. So I knew this beach was going to be perfect. It was going to be a great sunset shot anyway, but then I saw this Italian girl with some friends. She was jumping around, happy, and very spunky. I think anyone that wears a bathing suit like that has a bit of spunky-coefficient that is to be expected. Anyway, I thought she would add something to the beauty of the scene, so to speak, and I went over to talk to her.
She didn’t speak a lick of English, but there is an international language of gestures and “fun communication”. If you both go into it with a nice effort, then it’s really fun to try to talk to someone with this way. Anyway, she said her name was “Wendy” – Italian is “Guendalina.”
I asked her if I could take a photo while she strolled into the ocean. She excitedly said yes and bounced down to the beach. I already had my tripod set up with the background how I wanted it, and I motioned, giving her a specific direction in which to walk. Without a hitch, she walked right in with no problems, and I fired away. There was no need for a re-take, we got it on the first try.
I asked her if I could take a photo while she strolled into the ocean. She excitedly said yes and bounced down to the beach. I already had my tripod set up with the background how I wanted it, and I motioned, giving her a specific direction in which to walk. Without a hitch, she walked right in with no problems, and I fired away. There was no need for a re-take, we got it on the first try.
I normally would take 5 exposures here, from +2 to -2. If the sun was up, I would have done +3 to -3. But, this gal wasn’t standing still, nor did I want her to. Since I always shoot in RAW mode (JPEG is for children), I knew that one of my middle exposures would be perfect. I used one of those RAWs to create the final HDR you see at the opening of this post.
| Photograph by Rick Sammon |
Sammon: Go from flat to fab. When there is little contrast in a scene, HDR images tend to look flat. There are many ways to boost contrast, such as increasing the contrast in Lightroom, Photoshop and Aperture. The fastest and easiest way to boost contrast, as well as color and detail, is to use the Spicify filter in Topaz Adjust.
In Photoshop, Curves is the best way to increase the contrast range in a scene.
In Curves, create an "S" curve. But first, move the top and bottom of the Curve lightly inward. That helps to preserve highlights and shadows.
| Middle Exposure. |
Above: Middle exposure of three-exposure HDR bracketing sequence: 0, +2 EV and -2 EV.
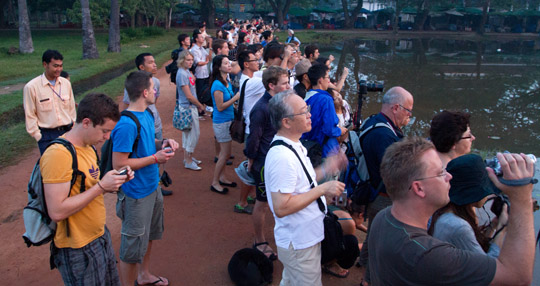
I took the pictures for the HR sequence at Angkor Wat, Cambodia about an hour after sunrise, when everyone, including my wife and I, were heading back to the parking lot. The boat was in a perfect position to balance the scene - filling up the dead space. If you go to Angkor Wat, get there about one hour before sunrise. It's packed with tourists and photographers with tripods!
I took the pictures for the HR sequence at Angkor Wat, Cambodia about an hour after sunrise, when everyone, including my wife and I, were heading back to the parking lot. The boat was in a perfect position to balance the scene - filling up the dead space. If you go to Angkor Wat, get there about one hour before sunrise. It's packed with tourists and photographers with tripods!
To learn more about Trey's HDR work, click here.
To learn more about my latest HDR project, Rick Sammon's HDR Portfolio app for the iPad, click here.
Explore the light,
Rick

