New to HDR and need an HDR program? You can save 15% when you order Photomatix by using this code: ricksammon. You can save 15% on Nik HDR Efex Pro by using this code: RSAMMON. For these codes to work, you need to be in the US.
This post has the HDR info you need to get started making great HDR image. My HDR app, Rick Sammon's iHDR. features my latest HDR images and tips.
Here is some “must know” HDR (High Dynamic Range) info. This is just a starting point for HDR photography – but hey, you gotta start somewhere.
Briefly, here’s what HDR is all about. You take exposures at the recommended exposure setting, and then over and under that setting – usually at +2 EV and at –2EV, but sometimes at greater extremes.
Then, using an HDR program like Photomatix Pro you combine your images into a single image that captures all the tones from your three (or more) images. How cool!
See the Light & Determine Bracketing
The first step in creating a HDR image (or any photographic image for that matter) is seeing the light. Most important in HDR photography is seeing the contrast range in the scene – the difference between the shadow and highlight areas. Seeing the color of the light, the direction of the light and the quality of the light is also important, because these factors also affect how we perceive a photograph. For now, however, we’ll only talk about contrast.
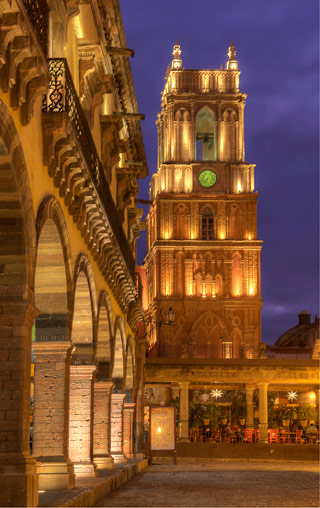
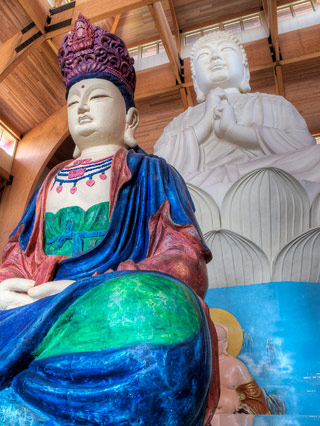
In the interior picture of a church in San Miguel de Allende, Mexico, the difference between the darkest and lightest parts of the scene is fairly wide. In the picture of a quaint street corner in San Miguel, the contrast range is not nearly as wide as in my church picture.

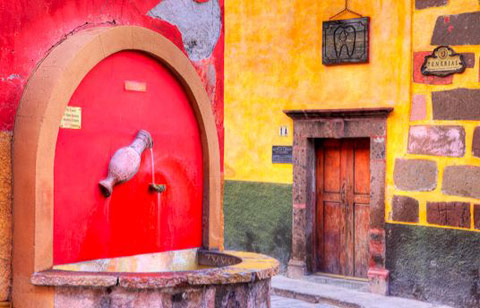
It’s the seeing and knowing the contrast range of a scene that helps determine how many exposures you need to capture the full dynamic range of the scene. That’s covered next.
Too Few and Too Many HDR Images
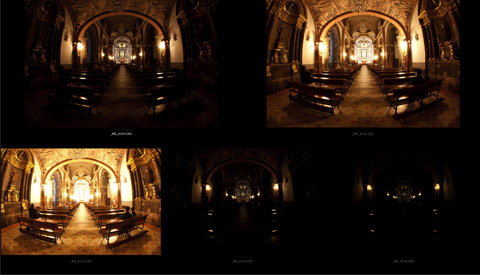
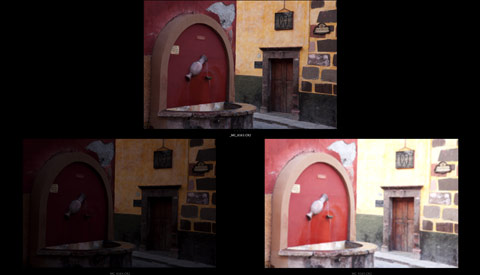
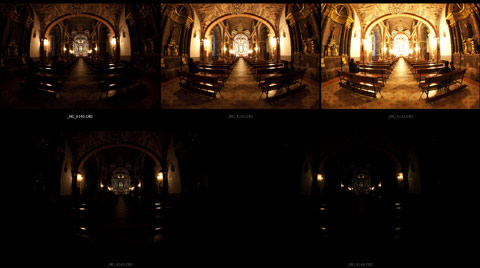
Below: Here are two screen grabs from Adobe Bridge of the files that I used to create the two HDR images above. For my church image, I needed to take five exposures to capture that dynamic range of the scene. I took exposures, using the exposure compensation feature of my camera, at the following settings: 0EV, +1EV, -1EV, -2EV and –3EV – for total of five exposures. For my quaint corner HDR image, I only needed three images: 0EV, +2 EV and –2EV.
The key to getting a good HDR image is not to take too few or not to take too many images. The more images you take, the more chance you have of getting digital noise in your images.
Spot Metering Can Help
If you are new to seeing the light, a spot meter can help you determine how many exposures you need to take. Most digital SLRs haves built-in spot meters. Spot meters are also sold separately. All spot meters measure the brightness of a small area (a spot) of a scene.
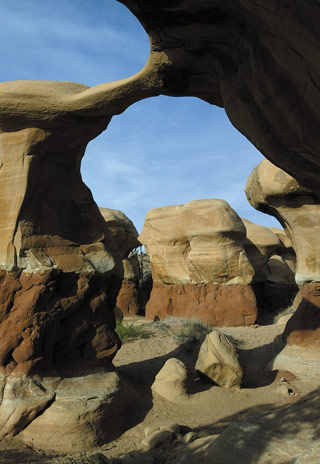
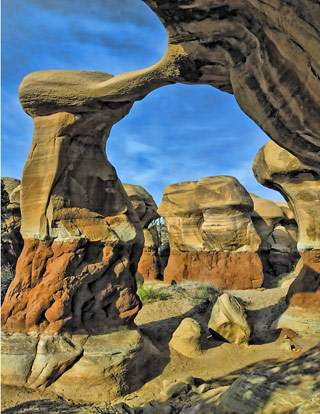
Below: This Devils Garden, Utah scene has a lot of contrast. Spot metering the sky and then the darkest shadow in this case would tell you that you have about a four-stop exposure difference – requiring four different exposures.
What Your Eyes See vs. What Your Camera Sees
Our eyes can see a dynamic range of about 11 f-stops; our cameras can only see a dynamic range of about 6 f-stops. That is why we need HDR photography – to capture the wide dynamic range of a scene.
Check Your LCD Monitor
A good method for ensuring that you capture the entire dynamic range of a scene is to check your camera’s LCD monitor.
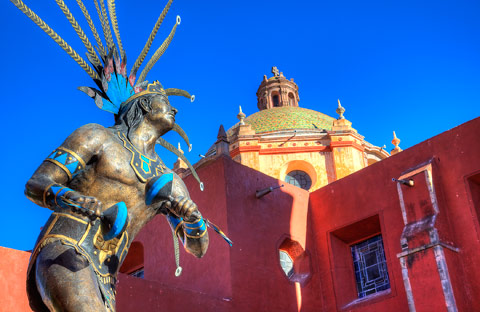
Basically, you want to underexpose a scene so that none of the highlights are blown out (reflections on the statue in this case), and that none of the shadows are blocked up (shadows on the building in this case). You can check these exposures by looking at your LCD monitor.
Look for Highlights and Shadows
When taking pictures for an HDR image, you don’t always have to take the same number of exposures in the same directions from the recommended exposure.
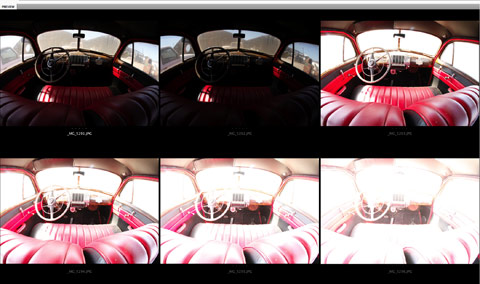
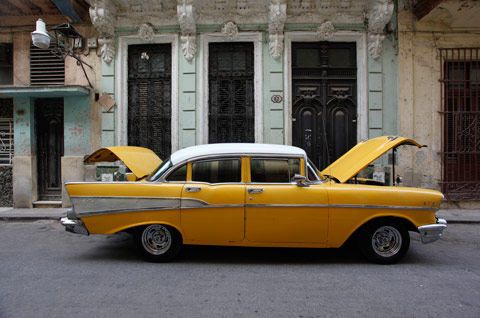
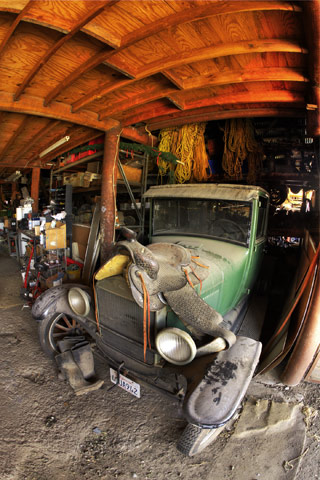
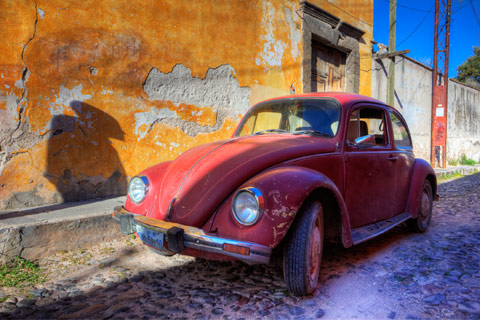
Below: When there are many highlight areas in a scene, as in my San Miguel church picture, you want to take more exposures under the recommended setting – to capture the entire dynamic range of the scene. When there are many shadow areas in a scene, as in my old car shot, you want to take more exposures over the recommended setting – again, to capture the entire dynamic range of the scene.
Careful Bracketing Pays Off
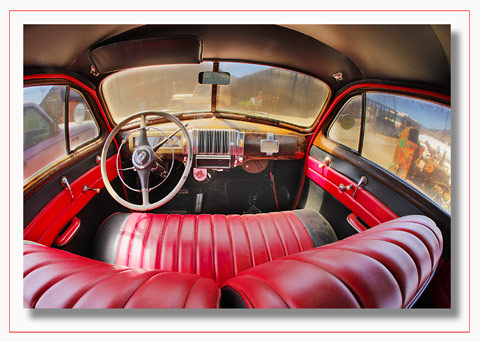
You saw the effectiveness of carefully bracketing my San Miguel church picture near the beginning of this lesson. Here you see the effect of carefully bracketing on my old car HDR image. This is one of my favorite HDR images. It’s a favorite because there is so much to see in the image. The more there is to see, usually, the more interesting an HDR image.
Hey, if you like the presentation of this HDR image, here is how I created the effect. In Photoshop, I used a Drop Shadow Layer Style. Then, also in Photoshop, I used the Stroke feature to create the red thin-line frame around the image.
Auto vs. Manual Bracketing
When taking pictures for an HDR image, you have to set your camera on automatic exposure bracketing (AEB) or you need to manually bracket your exposures. The end result is the same, but there are two factors to consider.
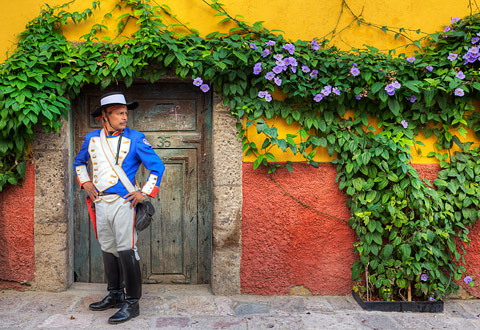
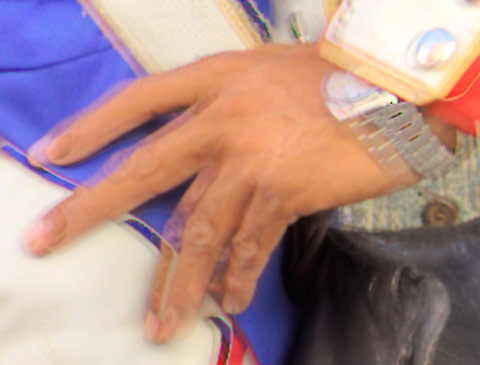
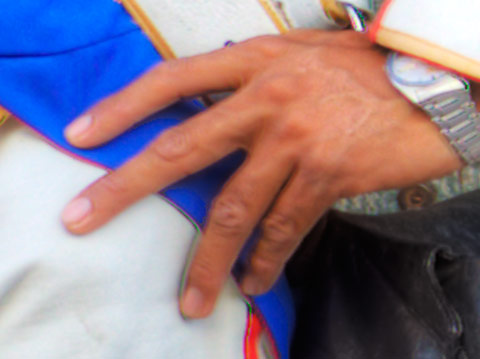
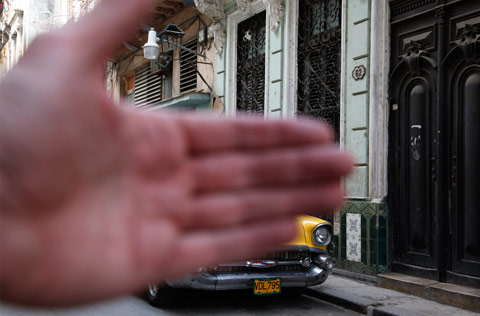
Automatic bracketing will be faster than manually bracketing, resulting in freezing the action if a subject moves, as did this police officer in San Miguel – as illustrated in the close up of his blurry right hand (from another set of images).
Manual bracketing may be required – if your camera does not offer the bracketing range that you need. Some entry-level and mid-range cameras only bracket two stops over and two stops under the average exposure. Professional cameras offer more.
Movement Can Be Okay
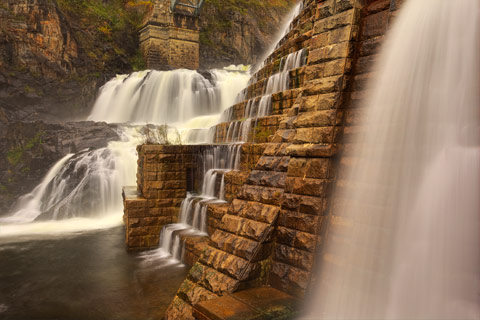
A slight movement, illustrated above by the movement of the man's hand, could ruin a picture. However, movement can be cool when it comes to an HDR image – when you are photographing moving water and moving clouds. This HDR image of the New Croton Dam was created from three exposures. My shutter speeds were between three and nine seconds for the set of exposures.
Two-Image HDR Images
Most photographers take at least three exposures when taking pictures for a HDR image. My friend Joe Brady at the MAC Group has another suggestion: Look at the scene carefully. If the contrast range is not more than two stops, take only two pictures – one exposure for the highlights and one for the shadows.
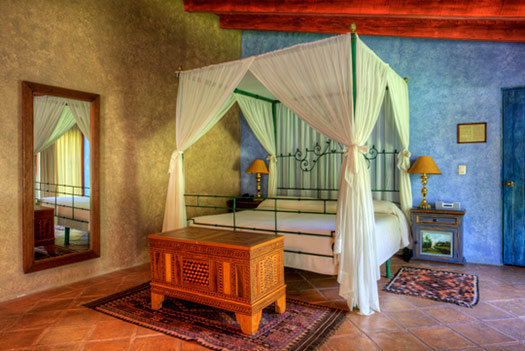
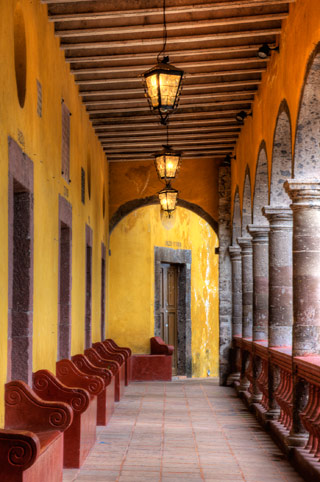
I tried Joe’s recommendation in the Villa de Santa Monica in San Miguel. It worked! Follow Joe’s advice combined with mine: Don’t create a HDR image from more exposures than you actually need. Digital noise may creep into your image.
Pseudo HDR Images
HDR images include more detail in the shadow and highlight area of a scene, and more texture. Nothing beats a true HDR image. However, we can create a pseudo HDR image from a single image using several different methods.
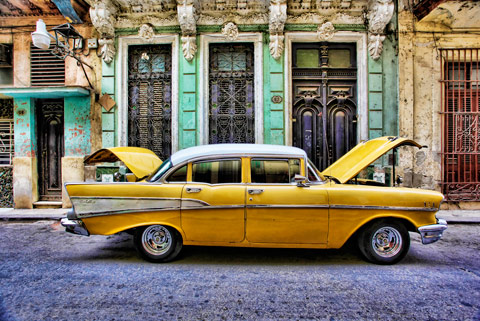
The fastest and easiest way, I’ve found, is to use a plug-in called Topaz Adjust. That’s what I used for my Cuba car image. You open an image in Photoshop, select the Topaz Adjust/Spicify filter, play with the sliders, click OK, and you have an image which looks somewhat like an HDR image. Sure, some shadows will be blocked up and some highlights may be overexposed, but if all you have is a single image, this is a cool method for creating the HDR look.
You can get more info on Topaz Adjust on my Creative Plug-ins page.
Aperture Must Remain Constant
In all HDR photography, you need to keep the aperture constant – to maintain the same depth-of-field throughout your set of pictures. That means you need to either shoot in the Aperture Priority mode or the Manual Exposure mode. In both modes, you can easily bracket your exposures.

Focus Carefully Then Shoot Manually
While taking several exposures for your HDR image, it’s not impossible that the focus can change – if you leave your camera on the auto focus mode. This is more likely to happened in low light situations (when contrast is low) and when there are different objects at different distances in the scene.
To ensure the same focus point in your set of pictures, what you need to do is this: first focus using the auto focus mode on your camera or focus manually, then switch to manual focus – without changing the focus. This technique will ensure that all your pictures have the same focus point. As with the aperture, if your focus point is a bit off, you can get a ghost image in your HDR image, or the entire image could be ghosted (which will look like an out-of-focus picture).
Reduce Digital Noise
Digital noise is exaggerated in HDR images because the more images you use, the more the digital noise. You can reduce digital noise, which shows up more in shadow areas and in plain areas like sky, by shooting at a low ISO setting.
Photomatix and Topaz, mentioned earlier, offer noise reduction features. You can also reduce noise in Photoshop, Lightroom, Aperture, Canon Digital Photo Professional and so on. However, your best bet is to try to get the best possible in-camera image. The more time you spend on that, the less time you’ll have to spend in the digital darkroom working on your pictures.
Steady Your Camera and Try Not to Touch
Sometimes subject movement is bad, as illustrated earlier by the man’s blurred hand. Sometimes it’s good, as illustrated earlier by the moving water. Camera movement is almost always bad in HDR images. Steadying your camera with a tripod is the best way to avoid camera shake, which will occur at slow shutter speeds when you handhold your camera. But you want to steady your camera for another very important reason: you want all your pictures to line up exactly – even though the align feature in Photomatix can be used effectively if there is slight movement between or among images.
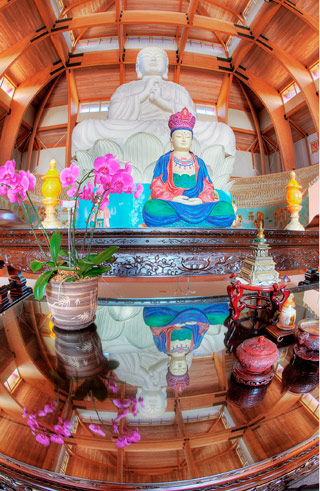
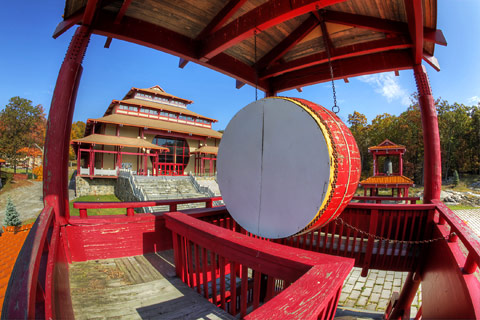
I used a tripod for this HDR image of a Buddhist temple near my home in Westchester County, New York. The tripod and camera created a shadow on the floor of the tower. I removed that shadow with the Clone Stamp tool in Photoshop. (We shoot here in October on my Croton Creative Workshop.)
Hand-held Images Can Work
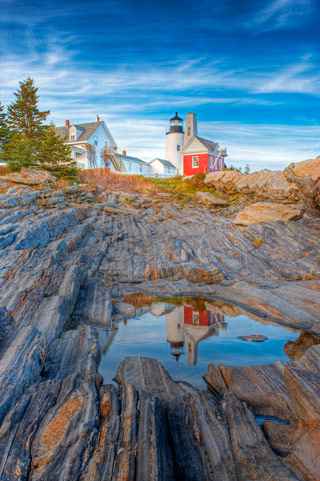
As I mentioned, a tripod is the best way to ensure a steady shot. That said, you might be able to get a sharp HDR image that you created with several hand-held shots. Here is one example, created from several pictures that I took in Rockport, Maine.
Here is what you need to get a series of shots that line up as much as possible: One, you need to hold your camera very steady. Two, you need a relatively fast shutter speed, at least 1/125th of a second when using a wide-angle lens, which is the lens of choice for most HDR photography. Three, you need a camera with a very rapid frame advance, six frames or more per second. Entry-level digital SLRs and compact cameras don’t offer as many frames per second. The slower the frame rate, the more chance you have of moving during the shooting sequence.
Basics are Essentials
To sum up, we have covered most of the basics of HDR shooting, but there is something else that is very important to consider: the basics of photography, including good composition, photographing an interesting subject, and making a picture rather than simply taking one, still apply.
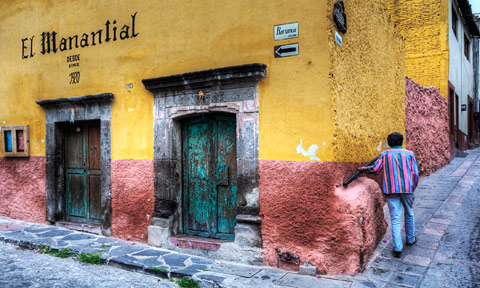
I made this picture by first selecting the location, then getting on site early so as to avoid traffic on the corner, and then asking the man to stand in position – simulating the effect that he was walking up the hill. So, don’t simply rely on HDR for great shots. You still need to use your head to make great pictures.
dSLR vs Compact Camera
Okay, I have to say it: Cameras don’t take pictures, people do! To illustrate this point, this HDR image was created from a set of three pictures I took with my Canon G10. All the other images in this book were taken with my professional digital SLR cameras. I like this image. You’ll see lots of detail in both the shadow and highlight areas of the scene. When it comes to HDR photography, you are the most important factor.
Sharpen Your HDR Images
All RAW files need sharpening. That’s because they come out of the camera a bit flat . . . to preserve details in the highlight areas. All HDR files need sharpening, too. My preferred sharpening method is to use Unsharp Mask in Photoshop.
Separate Your Shots
Below: Yikes! This is the worst photograph in this post. However, I think you will find them useful from an illustrative standpoint.
When you are taking sets of pictures for a HDR image, an easy way to separate the images is to take a picture of your hand between each set. That way, when you are scrolling through your files, you’ll see your hand between each set. If you don’t use this technique, you may accidentally pick the wrong photograph, with perhaps a different setting, for your HDR image.
Explore the light,
Rick
