Shooting Into the Sun is Kinda Fun

rick sammln for blog.jpg

Here's a fun shooting-into-the-sun image. I just created the image from a sequence of 6 images I took on my recent Route 66 road trip. The image gave me the idea for another Sammonism: "Shooting Into the Sun is Kinda Fun."

My other Sammonisms:
The name of the game is to fill the frame.
Dead center is deadly.
When you think you are close, get closer.
The camera looks both ways.
Expose for the highlights.
Use your camera like a spaceship.
Light illuminates, shadows define.
Backlight = shoot tight.
Make pictures, just don't take pictures.
See eye to eye - shoot eye to eye.
Take the darn flash off the camera.​
See through it, shoot through it.

Screen Shot 2013-04-16 at 10.10.16 PM.png

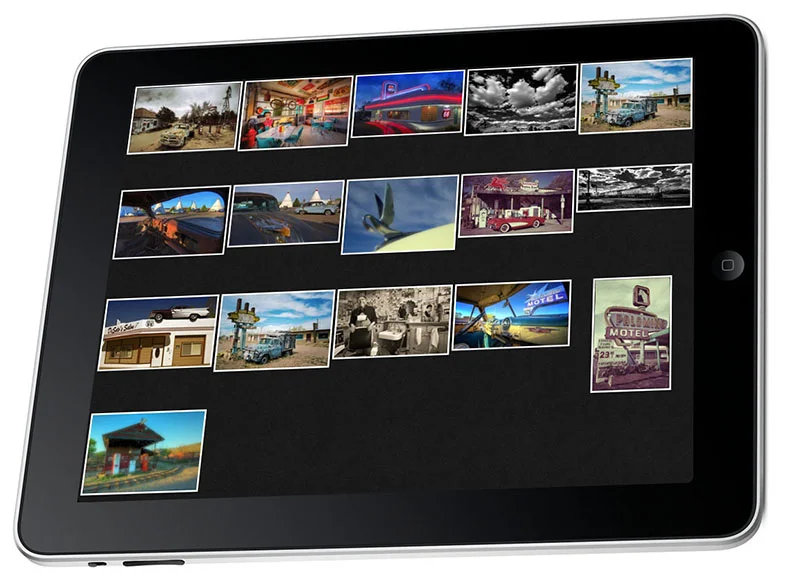
​Above is an Adobe Bridge Screen Grab of the 6 images I took with my Canon 6D. I used Nik HDR Efex Pro and the Duplex Filter in Nik on the final image. All my creative plug-ins are listed on my Save on Plug-ins page.

Re the sunburst: Set you lens at f/11 and have the sun peek out from behind an object in the scene. And . . . make sure your lens is super clean. A tiny speck of dust can result in a big blog in your picture.​

Check out my Route 66 Gallery on the left side of my blog.​ Ya gotta make the trip.

If you want to learn HDR, join one of my workshop. Good fun for sure.​

Explore the light,
Rick

This site powered by (designed and hosted on) Squarespace. Use one-click to get started with your own awesome Squarespace site.​

Today's Awesome (and fun) Guest Bloggers: Zach and Jody Gray

06.jpg

Thank you Rick for asking us to be guest bloggers on your site! Our post is entitled, "42 Seconds is all you have!" Here we go!

Did you know that the average website gets about 42 seconds of click-through time before people make the decision to act, or leave the site? Yikes! So what should our thought process be when looking at how our website is designed? Have we even thought through what we are trying to accomplish with our site? Do we want people to enjoy looking at lots of cool pictures? Do we want people to want to Pintrest all of our shots? Or do we want to actually turn a prospect into a client?

When we set out to build our current website, we had a very specific strategy:

1. Attract - We want to attract a client to something unique that helps us stand out from everyone else.

2. Excite - We want to excite them with content, not overwhelm them with images.

02.jpg

When I (Zach) used to play music professionally before I became a photographer, we were the opener band when we first started out. And guess what, no one comes to see the opener. When a prospect (someone that came to see the headliner, but we want to convert them to a paying customer of our music) hears us play, we need to attract them to us, play a short set to leave them wanting more, and give them a call to action (come to the table and meet us in-person). That is how we got record sales and created fans at shows. If you play too long, all people start to do is wish you were done and start chanting for the headliner.

We want to do the same thing on our website. We realized that if we have wedding galleries 1,2,3,4,5,6,7,8,9 with 50 photos in each one, no one will ever look at them all, they will get overwhelmed, and be soooooo bored by the end they won't even want to hit the contact button which is the only link that truly matters on your site! So we recommend showing 30 images tops and you will get more people contacting you for more.

We don't want people hanging out on our site, we want them acting. If the couple wants to see more images, they can head over to the blog or facebook and get engaged there. They will also get to see a full wedding in an album during our sales presentation to get an idea of an entire body of work.

3. Connect - That is it! We want them to contact us as soon as possible so that we can qualify them and and book them. We want leads and we want to turn those leads into clients.

03.jpg

(We will have another post on qualifying clients and how we specifically do that in one of our regular blog posts: Tuesday Photography Tips & Tricks.

Check out this video we made to see how this is practically done on our site!

​Thanks again Rick. We enjoyed being your guests.

Zach and Jody
zachandjody.com

Bio Image CloseCrop.jpg

Named as one of Nashville, Tennessee’s top wedding photographers in 2009, Zach and Jody Gray quickly gained national recognition for their imagery and business savvy in the wedding photography industry. They have hosted numerous highly successful photography workshops on business and shooting in the states and overseas, and have been invited to speak at WPPI, Imaging USA, creativeLIVE, and SWPP in London.  Their images have appeared in various publications including People, Southern Bride, and PPA Magazine. Zach and Jody have also been named by Westcott as one of their Top Endorsed Pros and are a part of the exclusive SanDisk Extreme Team. 

• • • • •​

This post sponsored by x-rite. X-Rite is the global leader in color science and technology. The Company develops, manufactures, markets and supports innovative color solutions through measurement systems, software, color standards and services.

Check out these cool x-rite products:
ColorMunki
Passport Color Checker


Check Out My New Route 66 Gallery - and the new Squarespace Portfolio app

rick sammon c.jpg

​I just created a Route 66 Gallery here on my Squarespace site. Check it out. If you like photo road trips, Route 66 is hard to beat.

Each night from the road I posted a series here on my blog: Six Days of Canon 6D Images from Route 66.​ Scroll down to check out the series. How-to info in each post.

rick sammon b.jpg

Here's something really cool about Squarespace Galleries: When you download the free Squarespace Portfolio app to your iPad and iPhone, your Galleries are automatically transferred to your mobile device. That makes sharing your pictures faster and easier than ever.

rick sammon a.jpg

Don't know about Squarespace? Here's a post a did a while back that I think you'll find interesting.​ 

If you are looking for an awesome new site, use one-click to get started with Squarespace - which starts with a free trial.

Explorer the light,
Rick

Today's Guest Blogger: Joe Brady

Bellvale Starburst Farm Small.jpg

Hey Rick! Thanks for inviting me to be a guest blogger on your site. Here's my post. I hope your readers enjoy it. Now . . . when are we going to play guitar again?

After getting some ice cream at the Bellvale Creamery in Warwick NY, my wife Diane and I decided to take the back roads home on a pleasant, warm July evening. We both had our cameras in the car as we were looking for some beautiful sunset vistas to photograph when we came across a barn that simply had to be photographed.

Luckily for us, we just happened to be driving by on the perfect day as the sun was setting in between the twin silos. The light was changing fast, so I jumped out of the car and positioned myself so that the sun just peeked out from the inside of the silos. Because this was going to be a hand-held shot, HDR wasn’t really an option, so I had to make sure to get the best exposure possible.

This meant putting my highlights as far to the right of the histogram as possible without clipping. As I was shooting a Canon 7D with a 17-55mm f2.8 lens and had tested the camera with Sekonic’s DTS software and meter, I knew that this camera safely captures up three stops from its meter’s middle reading (btw, this is a safe assumption for just about any current DSLR). To put this information to use, I put the camera in spot meter mode and took a reading off of the brightest part of the sky. My camera settings were 1/200th second and f16 at 160 ISO for this highlight, so I needed to open around 2 ½ stops (this gave me ½ stop safety margin) to put that highlight as far right as possible without blowing out the whites.

I also wanted the diagonal S-curve of the fence to lead to the barn, so I needed to make sure I had enough depth of field to keep everything in focus. That meant keeping my f16 aperture and since I wanted to keep enough shutter speed to have a sharp, hand-held capture, I pushed my ISO up to 800. This exposure gave me the widest use of the tonal range my camera offers and allowed me to process the file successfully. As a side note, you will generally get the starburst pattern with a standard lens set at f22, but the Canon 17-55mm f2.8 also does this at f16.

I’m sometimes guilty of not having a camera in my car and if that had been the case, I would have missed this incredible scene. Since then I’ve permanently put a small point and shoot in my glove compartment that I keep charged at all times. That way, I’ll always have at least one camera available when that perfect moment appears!

Joe Brady
www.joebradyphotography.com
www.dragonflystudiocafe.com

Have Some Creative Plug-in Fun This Weekend

rick sammon a.jpg

When we alter/remove/change the true color of an image, we remove some of the reality from that image. When we remove some of the reality, an image can look more artistic and more creative. Same goes for removing the sharpness.

That's what I did while working on the opening image for this post. The original is below.

r sammon.jpg

For the more artistic image, I used the Midnight filter in Nik Color Efex Pro - which is part of the Nik Collection by Google. That collection, by the way, now only cost $149, which is a super deal considering that Color Efex Pro alone used to cost more than that. Read more here.

A quick tip on using plug-ins: the subject often suggest an appropriate filter or filters.​

I took this picture on one of my Florida Photo Caravans, which are great fun. Shoot me an email if you'd like to get on the info list.

​Explore the light,
Rick

This site powered by (designed and hosted on) Squarespace. Use one-click to get started with your own awesome Squarespace site.​