
Do you like making bird photographs – and processing your bird photography images? If so, I think you will like my on-line seminar/class, Master The Art and Craft of Bird Photography. I'll show you how to photograph birds in flight . . . to birds on a stick.
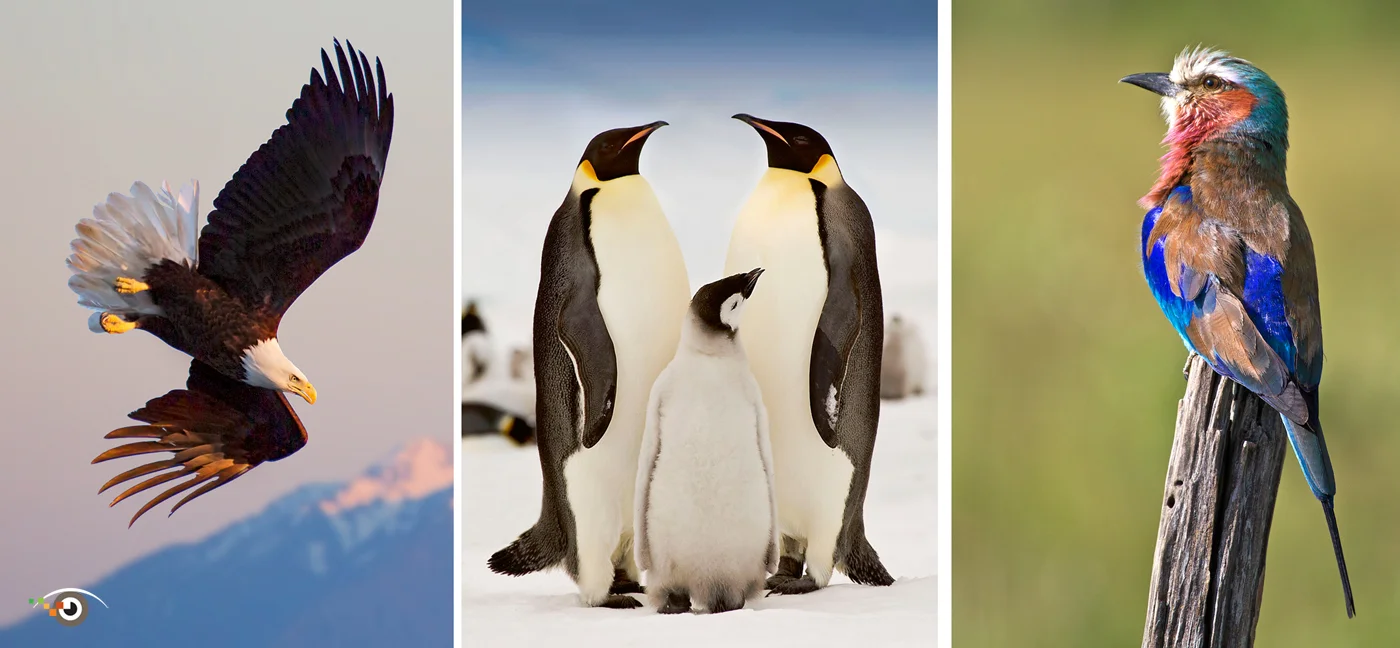
The class/seminar is about one hour in length and features my favorite photographs of our feathered friends.
Class Topics
• Introduction
• Learning
• Setting Goals
• A Bit of Blur
• Seeing the Light
• Story Telling
• Exploring Bosque
• Exposure
• Histogram
• Both Eyes Open
• Focus Point
• Light and Mood
• Basic Enhancements
• Think Like a Painter
• Daylight Fill-in Flash
• Birds on a Stick
• Art in Nature
• More Creative Images
• Gear
• Good luck

The seminar is a recording/QuickTime movie of my Keynote slide presentation, Master the Art and Craft of Bird Photography. You watch and learn at your own pace.

Click here to see a preview of the class - which features almost 150 images from my travels around the world.
That's me with my assistant during one of our bird photography shoots! :-)
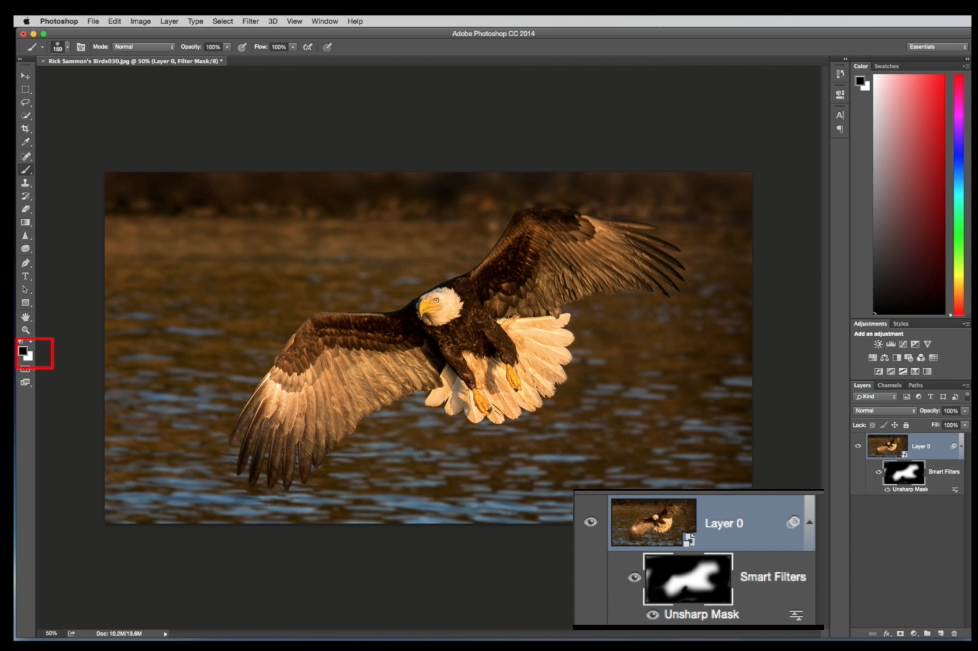
In the seminar/class I cover shooting and a bit of processing, including, "Thinking Like a Painter." In that section I talk about sharpening selectively, illustrated above with a Photoshop screen grab (from the class). Process: Filter > Convert to Smart Filter > apply Unsharp Mask, mask out the background. Sharpening the background would detract from the main subject, as well as increasing noise, which can show up in out-of-focus areas in a frame.

Of course, you can also sharpen selectively in Lightroom – illustrated above with two Lightroom screen grabs – top showing selective sharpening (on eagle), accomplished by holding down the Opt/Alt key when using the Masking slider (moving it to the right) in the Details panel.
The concept: A painter would not sharpen an entire image, so think/work like a painter.

Speaking of thinking like a painter . . .click the image above to see a clip that did not make it into my seminar/class. I did not include it because: I cover Thinking Like a Painter in the seminar/class - and because I wanted to keep the class just under one hour. So enjoy - and always think like a painter. ;-)

In the seminar/class I also talk about using plug-ins to improve images. Above is a screen shot that shows the Tonal Contrast filter in Nik Color Efex Pro - a cool way to increase contrast for a more dramatic image.

Above is a screen shot that shows another Nik Color Efex filter - Darken/Lighten Center - that I use to draw more attention to the main subject.

I also briefly cover Daylight Fill-in Flash in the seminar/class. For more detailed info on fill-flash, see:
Daylight Fill-in Flash - Layers Magazine
Daylight Fill-in Flash - Outdoor Photographer Magazine
Daylight Fill-in Flash - X-Train
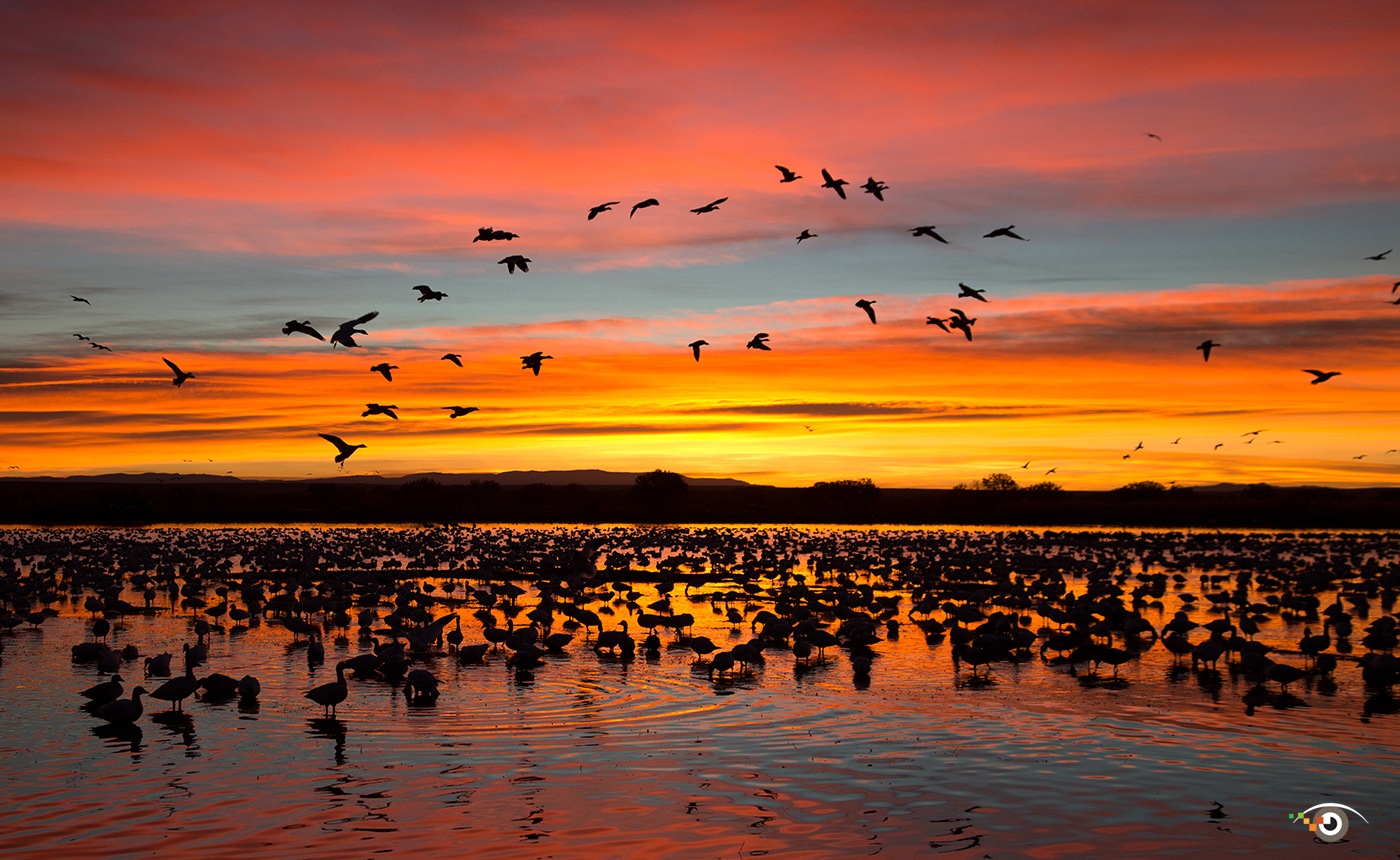
Above: A must-see for serious bird photographers: The Blast Off at Bosque del Apache, New Mexico. Below: grabbing a bite to eat in Alaska. :-)

Here are 10 quick bird photography tips:
1 - Focus on the eye. If the eye is not in focus, you’ve missed the shot.
2 - Make sure the eye is well lit. If it’s not, you have missed- the shot, unless you want a silhouette or if you are looking to create a sense of mystery in the scene.
3 - Expose for the highlights (small areas of bright feathers).
4 - Set your camera on focus tracking to track a bird right up to the moment of exposure.
5 - Set the focus point in your viewfinder to focus on a small area of the frame and set that point on the bird.
6 - Use a shutter speed of at least 1/1000th of a second to freeze the action fast-moving birds.
7 - Set your camera to the fastest frame rate to capture subtle differences in the subject’s body position.
8 - Take full-frame shots and environmental photographs.
9 - Watch the background. It can make or break your shot.
10 - When you are composing a photograph of a flying bird, leave some room in the frame into which the bird can fly.
Try to avoid these bird photo faux pas:
Left: bird is flying away from you (in some cases);
Right: tail is amputated.

Like photographing birds at zoos - but don't like the wire fences that ruin your photographs? Try the photographer's disappearing act, as illustrated above. Use a telephoto lens, place the lens (w/out a lens hood) directly on the fence where there is an opening, and shoot at the widest aperture. This set-up creates a very shallow depth of field, so the fence disappears. This techniques works best when the fence is black or in the shade.
In the top photo, I darkened the edges of the frame to draw more attention to the main subject.
Below: The technique works for big cats, too! :-)

How cool! Steve Bailes from Spartenburg, SC sent me a note with the following cool tip. Check it out! Thank you Steve!

Looking forward to your bird seminar. One trick you may not know that I learned from birdwatching.
Sometimes there is a bird that just won’t come out in the open for a photo. I use an Audubon app on my I-phone.
When I was at the coast, I knew the sound of a painted bunting but it was across the marsh. I simply took out my phone, pulled up the bird and played the vocalization (which it heard from 50 yards across.) As soon as it heard it, the bird flew and landed within 20 feet, ready for a photo. Since I was near some bushes with dead branches, I guessed where it would come and set myself so that the sunlight would hit it when it landed.
This isn’t a photography trick, just a bird trick, but it works very well in the springtime and early summer to draw birds into close range.
• • • • •
PhotographerSusan Wilkinson makes a good point (on a Google+ post) about bird vocalization apps. Take it away, Susan.
Steve's use of a bird app's vocalizations to call in birds is a common practice and one that I have used as well. I just want to make a point that I think should be mentioned.
"First, it is important to point out that the use of playback is prohibited in many parks and refuges. It is also illegal to disturb any endangered or threatened species (and playback can be interpreted as disturbance). Any potential negative impacts of playback are more likely to occur in areas with a lot of birding pressure, so avoiding playback entirely in those places is a good idea. Where and how to use it in other situations is up the individual birder."
Credit: Sibley Guide
Many federal, state parks and wildlife refuges do not allow the use of such apps. Also, there are many avid bird watchers and photographers who frown upon the use.
Here's a few links for anyone that is interested in the use of these apps:
American Birding Association
http://iphone.ibird.com/ABA_Ethics.html
Sibley Guide
http://www.sibleyguides.com/2011/04/the-proper-use-of-playback-in-birding/
Ethics of Bird Calls
http://birding.about.com/od/birdingbasics/a/Ethics-Of-Bird-Calls.htm
Thanks for sharing all your wonderful tips and beautiful images, Rick.

Here's a look at the gear I use for my bird photography:
Cameras/Lenses
New Canon 100-400mm IS lens
Canon70-200 f/4 IS lens
Canon 24-105mm IS lens
Canon 400mm DO lens
Tripod/Ball Head
Induro CT 214
Induro BDH 1
Speedlites
Canon 600EX-RT Speedlite
Canon ST-E3 Speedlite Transmitter

Like black and white bird photography? Learn about how color filters (in plug-ins) change the tones in a photograph. Experiment with different color filters to see which one is best – for you.
Also know that contrast becomes more important when the color is removed.
Like on-line learning? Click here to see all my on-line classes.
Explore the light,
Rick