Got Web/Mobile Galleries? If Not, What Are You Waiting For?

rick sammon.jpg

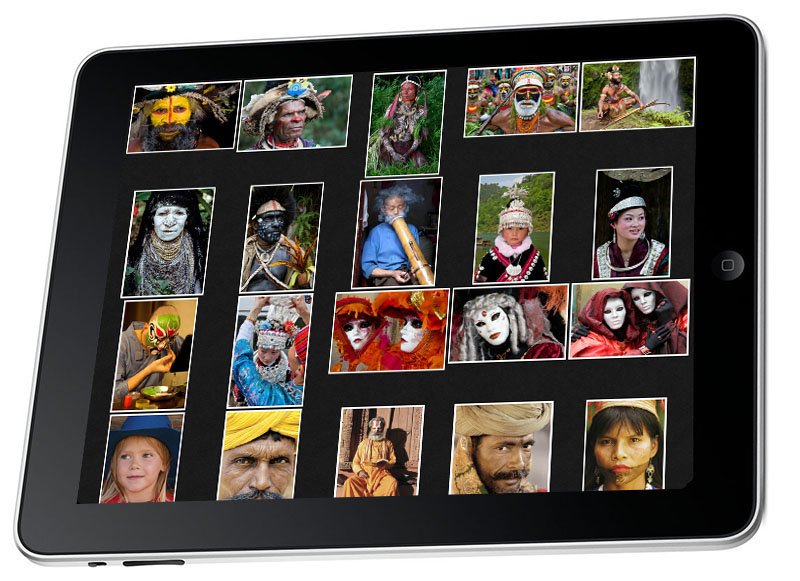
Above: Images in my World Portrait gallery.

When I give a presentation on the business side of photography, I say to my students: "Your pictures do you absolutely no good sitting on your hard drive and backup hard drive (or hanging out in the cloud). You need to get your best work out there for others to see. Today, even though the methods for showing and sharing one's work has changed, the old adage - 'Publish or Perish' is still true."

In addition to getting your work "out there," galleries are a way to generate income. For me, I print the images in my galleries and sign each one. Most of the photographers I know, however, opt for on-line, automated sales. 

I tell my students that the best way, as well as the easiest way, I've found to share one's work is through the web-based and iPad/iPhone galleries offer by Squarespace.

Screen Shot 2013-07-11 at 10.01.11 PM.png

Above: My most recent Gallery - Camargue Horses.

If you click the Galleries on the left side of this page, you'll see a drop down menu of my galleries, which I am constantly changing and updating. For example, I added my Camargue gallery shortly after returning from a workshop that I was leading in Provence, France. Adding that gallery, by the way, took about 20 minutes, thanks, in part, to the drag-and-drop feature of adding pictures in Squarespace galleries. Converting my RAW files to JPEGs with Photoshop's Image Processor was also time-saver.

rick sammon a.jpg

Above: Squrespace Portfolio app on my iPhone. Full-frame view is also an option.

Speaking of included features and ease of posting, Squarespace offers a free mobile app - for both the iPad and iPhone - called Portfolio. With this awesome app, your website galleries are automatically linked to your mobile device, so you can share your pictures while on the road.

rick sammon b.jpg

Above: Thumbnail view of my Route 66 Gallery on my iPad. 

I gladly, happily and eagerly share my images. Sometimes for fun. Sometimes for business. I always encourage the sharing aspect of galleries.

I meet some photographers throughout the year, however, who don't have on-line galleries. Some don't want to share their work, for fear of someone stealing their images. Others think it's too difficult to create galleries. Still, some photographers don't think they need galleries.

rick sammon c.jpg

Above: Images look awesome full screen on the new iPad.

I'm interested in your take on on-line and mobile galleries. Do you have galleries? If so, why - and how are they helping your business, or helping you to simply have more fun with your photography. Likewise, if you don't have galleries, why not?

Please leave your comment in the Comments section here so other can read and learn.

Explore the light,
Rick

Perception is Everything - I Guess

© Rick Sammon.jpg

I guess perception is everything.

Someone just sent me an email saying that I am "overly fond of HDR." Kinda interesting, as HDR is only one of the image processing techniques I use and teach on my workshops.

By the way: Ansel Adams was also "overly fond" of HDR. He used different papers, chemicals, filters and burning and dodging to create beautiful "HDR images" in the wet darkroom.

Anyway, it's always good to keep in mind that perception is everything. Maybe someone out there thinks I am "overly fond" of wildlife photography. :-)

I took this shot of a sea lion pup in Galapagos. I took the shot of a whale shark – the largest fish in the sea – in the Maldives.

© Rick Sammon.jpg

Explore the light, 
Rick

This post sponsored by x-rite. X-Rite is the global leader in color science and technology. The Company develops, manufactures, markets and supports innovative color solutions through measurement systems, software, color standards and services.

Check out these cool x-rite products:
ColorMunki
Passport Color Checker


Today's Guest Blogger: Andy Smith

DT_3.jpg

First, thanks to Rick for asking me to do this guest blog post. I've been on several workshops with Rick and I have to say, they are a great learning experience and a ton of fun. What's more, you meet great people!

Rick asked me to write this guest blog post because I, along with Mike "Spike" Ince, will be leading the nighttime photo session on Rick's Southwest Photo Caravan later this year. (Note from Rick: All my 2013 workshops are full, but space is available on my 2014 workshops.

I’m going to be outlining the basic steps to creating a simple timelapse video using Adobe Lightroom 4 with a bit of help from LRTimelapse.

If you’ve seen any of the incredible night-sky timelapse videos on the web and wonder how they do it, the good news is that the basic process isn’t that hard. The main steps are:

1) Create a sequence of photos.

2) Process them as desired in Lightroom, using Auto-Sync to make sure all the photos are adjusted the same.

4) Export the entire sequence as a Lightroom Slideshow video using some slideshow and video export presets from LRTimelapse.

In my case, after catching the night photography bug at the VLA during last year’s Bosque Del Apache workshop with Rick and Juan Pons, I attended a night photography workshop at Devil’s Tower with Colorado night-photography instructor David Kingham.  While it wasn’t specifically a time-lapse workshop, I was left with several hours-long sequences of photos and he recommended I look into LRTimelapse for creating time-lapse videos.

DT_1.jpg

Above (click here to watch): The Milky Way over Devil’s Tower with the lights of Hulett, Wyoming over the horizon.

LRTimelapse is available at LRTimelapse.com. There’s a full paid edition, but the free edition will do quite a bit to start. The software allows you to deflicker your photos and do adjustments across the entire sequence, but for this simple example, I only had to use the export presets that come along with the software. Download and install the software, paying specific attention to getting the included Slideshow and Video presets installed.

As far as the photos themselves, obviously you’ll need a tripod and an intervalometer.  I’ll skip over the those details for this post and just talk about creating the video, but you can check Mike (Spike) Ince’s prior guest post on night photography.  My night photos were all 30-second exposures with one second between.  Because the light was consistent across the sequence and I was in manual exposure mode, I didn’t get any flicker that might need to be adjusted.

DT_2.jpg

Above (click here to watch): A wider, fisheye view with more metors.

After you import all your photos into an individual directory in Lightroom, you can make whatever adjustments you need to get them looking how you want.  Use Lightroom’s Auto-Sync feature to apply the adjustments consistently across the entire batch of photos.  Or, another option is to edit one of the sequence as desired, then cut and paste the Lightroom adjustments to the rest of the photos.

After you’ve gotten your sequence edited, the next step is go into the Lightroom Slideshow module and select your entire sequence of photos. Use one of the LRTimelapse presets - they will set you up for a clean video sequence. For mine, I used the 15-fps 1080p preset from LRTimelapse.  Then I just used the 1080p setting for the video export.  When your export is done, you will have an mp4 file you can then play or upload to Youtube or Vimeo.

That’s really all I did here.  It’s simple, but gave me enough of a start to want to learn and do more.  Further steps include using LRTimelapse to handle the flicker you can get from auto-exposure adjusting to changing light levels, or day-to-night transitions (like the moonrise at the end of these videos).  Then there’s adding music, editing multiple sequences together, etc.

DT_3.jpg

Above (click here to watch): Devil’s Tower Creek Reflection with Star Trails, Light Painting, and Wandering Photographers

I’ll leave you with a couple of observations. First, it takes a lot of photos to generate a short sequence - at 15 frames per second, 2 hours of images generates only 16 seconds of video.  And second, both night photography and timelapse are extremely addictive. know! I’m going to be doing many more.

Good luck trying this on your own! 

Thanks again Rick! I look forward to our Southwest Photo Caravan.
David Kingham Photography  
Spike's Guest Blog Post on Night Photography

Andy Smith on Google+

Andy Smith Photo Website

Save $100 on the Topaz Bundle Until July 7th

rick sammon alaska.jpg

Hey Gang! 

If you like making creative images, take advantage of the incredible 4th of July sale and get $100 off the Topaz plug-in Bundle! From now until July 7th you can purchase the Topaz Bundle for only $199.99 with this promo code: july4.

You can save $100 and order The Topaz plug-in bundle here.  

Screen Shot 2013-07-04 at 11.11.27 AM.png

I used the HDR filter in Topaz Adjust to make this image pop with color, contrast and detail. Check out how the filter brings out the detail in the eagle's wings.

Explore the light,
Rick