Soon Come: Battle of the Close-up Photography Tips: Pons vs. Sammon

Photograph © Rick Sammon
First there was the "Battle of the HDR Photo Tips" with my friend Trey Ratcliff. Type "Battle of the HDR Tips" in the search window of my blog to see the different rounds.

Well, the next battle will be the "Battle of the Close-up Photography Tips," with my friend Juan Pons.

Juan and I enjoy doing the Digital Photo Experience Podcast. But heck, first and foremost, we are photographers. So, our week-long "battle" will be a blast. 

Here's a quick tip for starters: If you are serious about close-up photography, get a ringlight. A ringlight can produce shadowless lighting and ratio lighting (because you can adjust the flash output of the flash tubes). It lets you shoot hand-held close-up photos – like my photo of this red-eye tree frog. A ringlight also lets you shoot at small apertures for good depth-of-field.

Here's a link for more info on the ringlight I use: 
Canon MR-14EX Macro Ring Lite for Canon Digital SLR Cameras


Stay tuned for details.


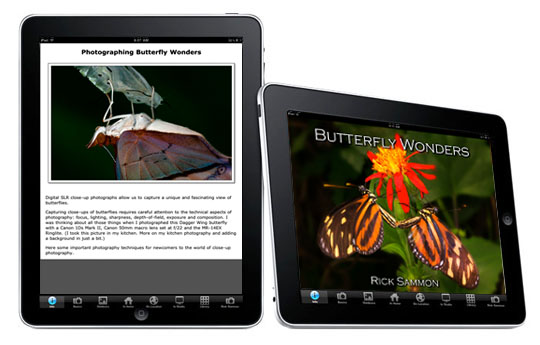
Hey, if you like close-up photography, and butterflies, check out the iPad app that Juan and I developed: Butterfly Wonders.


Explore the light,
Rick

One Light Wonder - A Way-Cool and Creative Effect with a Single Canon Speedlite


On Monday I posed a question here on my blog about lighting an image. Click here to see that post.

RedTerror guessed correctly. I hope he/she is nicer than that name! :-)

Anyway, here is a follow-up post that includes a lighting diagram that I created with online Lighting Diagram creator.


The key to this effect, taught to me by my friend Jack Reznicki, is to get a beautiful rim light around the person's profile. You may not get this the first time you shoot. Experiment with moving the subject around.

My original photograph is on the left. I created the image on the right using the Exposure Correction filter in Topaz Adjust.

Light It! offers basic lighting ideas. I am working on Light It! II.


Click here for info on all my apps.

I'll be sharing this technique later this month at Photoshop World during my Canon Speedlite session. I hope you can join the flash fun.

Thank you again, Jack, for showing me this way-cool effect.

Explore the light,
Rick


Any Guesses on How I Lit This Image?

Hey Gang!

Any guesses on how I lit this image? Hint: I used a Photoshop trick, too.

Post a comment here. It's fun, and pretty darn useful, to try to see the light - including the direction of light.

Answer on Wednesday . . and.. we now have a winner!

I'll send the first person (in the U.S.) who guesses correctly (the lighting technique and the Photoshop trick) an autographed copy of my book, Exploring The Light. You must be as detailed as possible... the position of the light, the type of light, etc.


How do we know who is first? Easy. The time of a Comment is listed in the Comments on this page.

Explore the light,
Rick

Part I: Girl with a Pearl Earring - The Photograph

Photograph on right © Rick Sammon. All rights reserved.
One of my favorite paintings is, "Girl with a Pearl Earring" by the Dutch master Johannes Vermeer. The painting has been referred to as, "The Mona Lisa of the North." Hey, I like it even better than the Mona Lisa.

One of my favorite movies is "Girl with a Pearl Earring," starring Scarlett Johansson.

Both the painting and the movie inspired today's shoot. I wanted to recreate the lighting and look and feel of the portrait with my digital camera and bit of Photoshop work. I made the portrait in my office – I don't have a studio.

I'm kinda jammed right now, but tomorrow or the next day I will show you some behind-the-scenes shots from the shoot. I'll also share the tech info on the making of the "Girl with a Pearl Earring - The Photograph."

Okay, a quick tip: I used the Portrait Smooth effect in Topaz Adjust to smooth out the model's skin. For more on Topaz Adjust, click here.

Stay tuned.

For now, try this type of "self assignment" at home.  After all, it's Sunday, a day off for many folks. Find a painting that you admire, see the light, note the props, and try to make a photograph that looks like the painting.

Another idea is to find a photograph that you like and . . . :-)

I teach stuff like this on some of my workshops and at my seminars. Join the fun!

Explore the light,
Rick

P.S. If you like photographing people, you might like my book, Face to Face:


Battle of the HDR Photo Tips Round 7: Ratcliff vs. Sammon

Photograph by Trey Ratcliff
It's Round 7 – the final round of the week-long Battle of the HDR Photo Tips: Trey Ratcliff vs. Rick Sammon. Thank you all for sharing in the HDR fun this week!

Trey Ratcliff is some dude on the internet that runs Stuck in Customs. His mom visits his blog every day. If people leave bad comments, then his mom gets 'em.

Rick Sammon was at Woodstock and still tries to maintain the PLJ feeling of the '60s. He also dived in Lake Baikal, Sibera, where he photographed the nerpa.

Here we go:

Ratcliff: We have an area of StuckInCustoms.com called The Clubhouse (people that get the video above get access) — I asked members in there to add their favorite short tips, and here they are a few:

Alex Suarez - “When shooting from a tripod, I like to hang my camera bag from the center column. Adding this extra weight firmly plants my tripod, further reducing the chance of camera shake.”

Marc (marcp_dmoz) – “If you are shooting in low light conditions and you can’t use a tripod, switch ‘Auto ISO Sensitivity Control’ on when bracketing for HDR.”

Eden Brackstone – “Never process your shots the same day you take them, allow your creative energy to build up and apply it when you will get the best results. Then, wait some more and revisit it. Ultimately, a late and well processed image is more valuable than a rushed one that you regret…”

And here is my last tip for the "battle" with Rick: “Practice RAW HDR processing a lot… there are countless moments that just don’t happen in brackets (like the photo above).”

Did you miss my the other tips?  Here they are, listed out:

Photograph by Rick Sammon
Sammon: Put the viewer in the scene. One way to accomplish this goal is to use a strong foreground element. Also, it's easier for the view to picture himself or herself in scene if everything in the scene is in focus – just like a scene looks to our eyes.To accomplish that goal, use a wide-angle lens, small aperture and focus 1/3 into the scene.

For this shot, set up my tripod in the back sat of this old car and held very very still while I shot.


Hey! I don't have a Clubhouse like Trey, but I do have a flickr group where photographers can share their work. Click here to join the HDR fun!

To recap the entire "battle," just type in Battle of the HDR tips in the search window of this blog.

• • •

To learn more about Trey's HDR work, click here.

To learn more about my latest HDR project, Rick Sammon's HDR Portfolio iPad app - a how-to app packed with tips, click here.

Thank you Trey for agreeing to the "battle," and thank you all for joining us ringside.

Explore the light,
Rick