Grab a quick lighting tip - and maybe a cool Westcott prize. Click here for details.
Explore the light,
Rick

studio photography
Grab a quick lighting tip - and maybe a cool Westcott prize. Click here for details.
Explore the light,
Rick
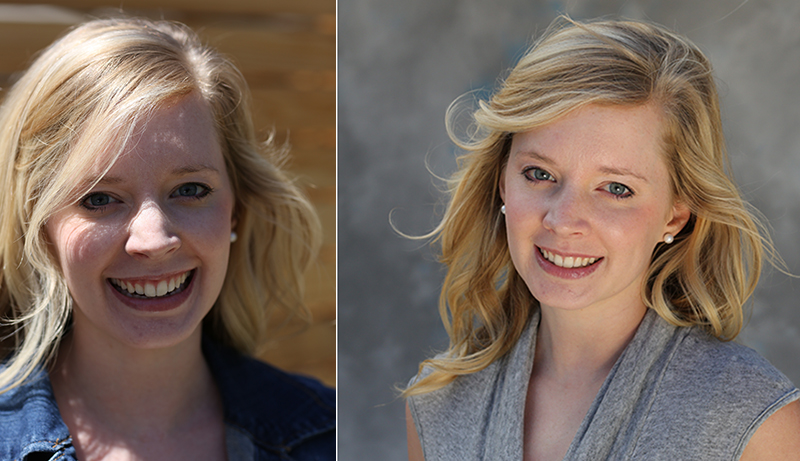
Making beautiful outdoor portraits in harsh light is as easy as 1, 2, 3 – that is, using three accessories.
To make the portrait on the right, I used:
- The diffuser in the Westcott 6-in-1 Reflector/Diffuser kit to soften the harsh light coming from the top left;
- The sunlight surface reflector in the Westcott 6-in-1 Reflector/Diffuser kit to bounce some light onto the subject's face, and to add a nice catch light to her eyes.
- Covered the wall behind the subject with the Westcott April Showers/Bracken Brown background (April Showers surface)
I talk about controlling light in my upcoming on-line class on lighting in and around your house. Shoot me an email to get on the info list. The class should be up in June!
Explore the light,
Rick
This post sponsored by x-rite. X-Rite is the global leader in color science and technology. The Company develops, manufactures, markets and supports innovative color solutions through measurement systems, software, color standards and services.
Check out these cool x-rite products:
ColorMunki
Passport Color Checker
Coming in June: my new, cool on-line/on-location lighting class. In the class I use some $10 lights and go from: average to awesome, snapshot to great shot, from drab to fab, from mundane to marvelous, etc.
Here are to some shots from today's shoot.
Of course, some technique is involved when using $10 lights. I'll share all this stuff with you in the class. Stay tuned to my blog for the release date. You can subscribe here.
Oh yeah, I also use some professional accessories in the class. The more the merrier.
Explore the light,
Rick
P.S. This class will be launched at the same time as my Landscape Photography class.
This post sponsored by x-rite. X-Rite is the global leader in color science and technology. The Company develops, manufactures, markets and supports innovative color solutions through measurement systems, software, color standards and services.
Check out these cool x-rite products:
ColorMunki
Passport Color Checker
Croton-on-Hudson, New York artist, Eddi Flemming in her studio.
Later today I'm starting my series: Six Days of Speedlite Tips. As a prelude to the series, I thought I'd re-post a blog post I did earlier this year on my first session with my new speedlite system: Canon Speedlite 600EX-RT and Speedlite Transmitter ST-E3-RT. Here goes.
To test the new gear, I set out to make a photograph of a person with a
very discerning eye: local painter Eddi Flemming. Yes, I wanted to test
and get familiar with my new camera (the Canon 5D Mark III) and speedlites, but I also wanted
Eddi to be 100 percent happy with the environmental portrait - a
picture of the artist in her environment.
Above is the result of the shoot. Eddi loved the color and sharpness of the image. I had the same comments.
But I'll add that the new speedlites
and transmitter are super easy to use - and the ETTL is super accurate.
I used two speedlites for the shoot - one set on channel A and the other on B. Both were set on ETTL.
My main speedlite, positioned to camera left in a Westscott Apollo Orb soft box, was set, via the on-camera transmitter, to 0EV exposure compensation.
My fill light, hand-held by my wife, Susan, was positioned to camera right and was set, via the transmitter, to -2EV for just a touch of fill light.
Adjusting the power output of the speedlites is a fast and easy, "touch-of-a-buttons and twirl-of-a-dial process" with the Canon ST-E3-RT wireless transmitter.
I know a lot of pros who set their speedlites on the Manual mode. However, I have found that ETTL works perfectly for me. As my dad used to say, "To each his own."
Above is a behind-the-scenes shot taken by Susan Sammon. She was using a 5D Mark III and Canon 14mm lens. For my shot, I used my Canon 5D Mark II and my Canon 17-40mm lens.
My camera was tethered to my MacBook Pro with my Tether Tools kit.
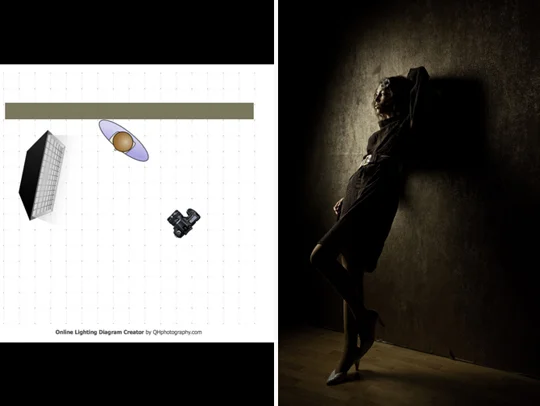
I think Eddi is having a good effect on my photography. Now, when I make a picture, I try to think like a painter - which is something I cover on my workshops. I think more about shadows, and how important they are in a photograph. See the image below.
You'll find lots of lighting tips in my apps.
If you like stuff like this, you can subscribe to my blog here.
Explore the light,
Rick
This post sponsored by Westcott. Check 'em out for all your lighting needs.
This site powered by (designed and hosted on) Squarespace. Use one-click to get started with your own awesome Squarespace site.