landscape photogrpahy

Gearin' Up for My Utah National & State Parks Road Trip

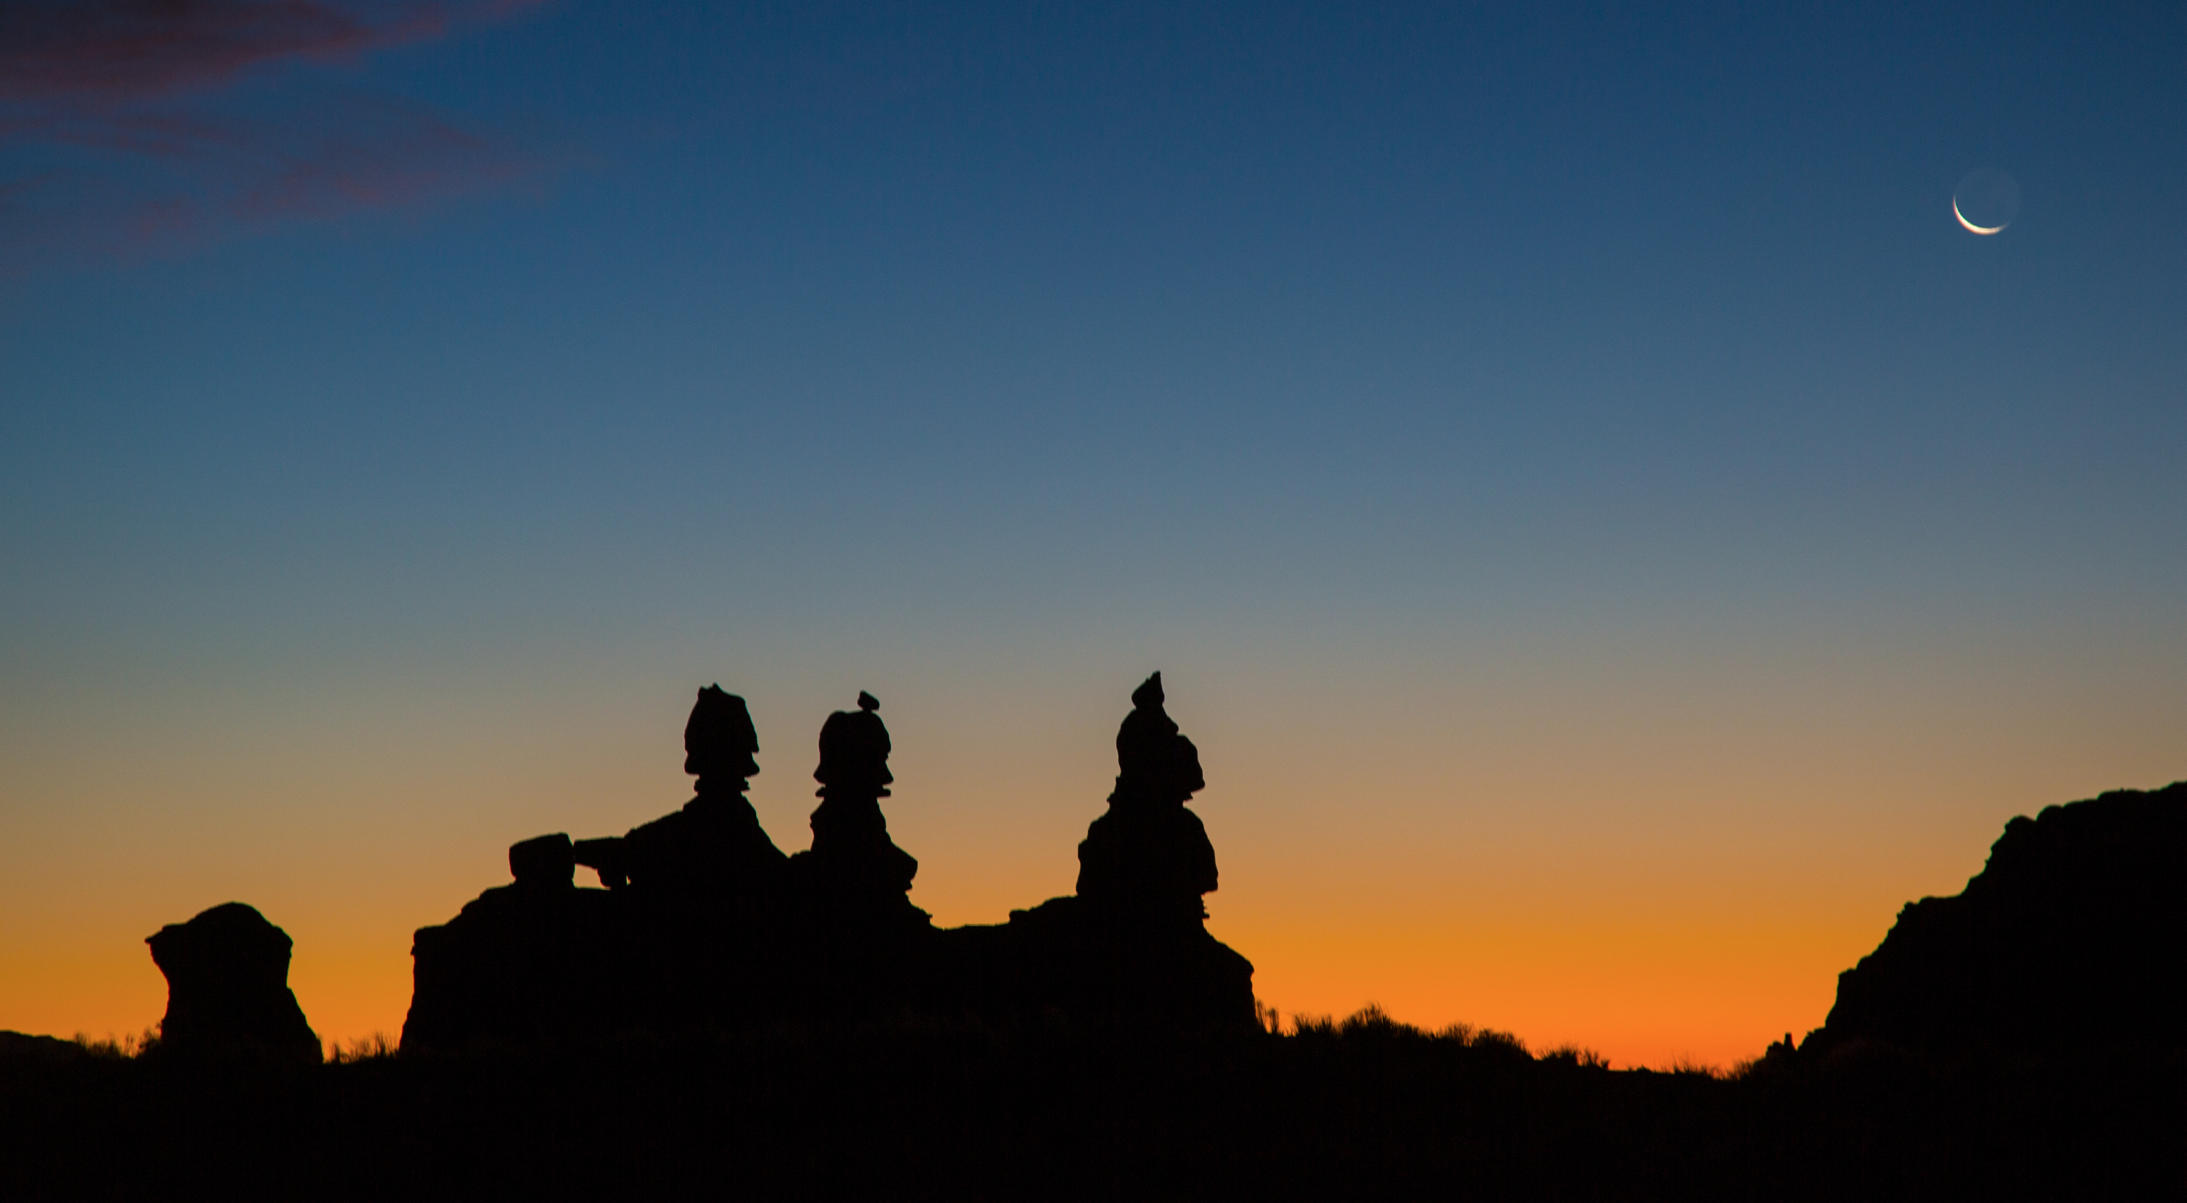
Dead Horse Point State Park, Utah.

Dead Horse Point State Park, Utah.

Susan and I are heading out next week for another awesome road trip, where we’ll be exploring Utah’s State and National Parks. Photos to come.

For now, I thought I’d share with you “what’s in my carry-on bag” to give you an idea of the gear I use for landscape photography - and why. Here goes.

Canon R (mirrorless) with new 24-105mm IS lens - my new “go to” camera/lens for travel photography.

Canon R lens adapter ring - so I can use all my Canon lenses on the R.

Canon 5D Mark IV - for shooting videos and stills.

Canon 16-35mm lens - my main landscape lens.

Canon 24-105mm IS lens - for tighter landscape shots.

Two Canon battery chargers and a total of four batteries, so I always have power.

Really Right Stuff ball head - in case my luggage is delayed, I can buy a tripod on site and still use my RRS ball head. I never lose site of my ball head. I do pack my tripod in my checked luggage.

Delkin Devices SD and Compact Flash cards/card reader - to safeguard my photographs.

Goblin Valley State Park, UT.

Goblin Valley State Park, UT.

Black Rapid strap - for easy camera handling when I am not using my tripod.

Breakthough Photography magnetic ND and polarizing filters - for long exposures and to reduce glare/darken a blue sky.

Two head-mounted flashlights - one for me, one for Susan.

Canon G7 X - for fun shots along the road.

Allen wrenches - for tightening my tripod legs and camera plates.

Platypod - for low-level, creative shooting.

Blower to keep my sensors clean - and lens cleaning cloths to keep my lenses clean.

I have another bag for my computer stuff. So I have a total of two carry-on bags.

All this gear fits in my Backlight 26L MindShift camera bag, shown above.

For great deals on gear, check out Adorama - more than a camera store.

All my gear is listed here.

Needs some tips on travel photography? Check out my KelbyOne classes.

Explore the light,
Rick

Why Breakthrough Photography Magnetic Filters Rock

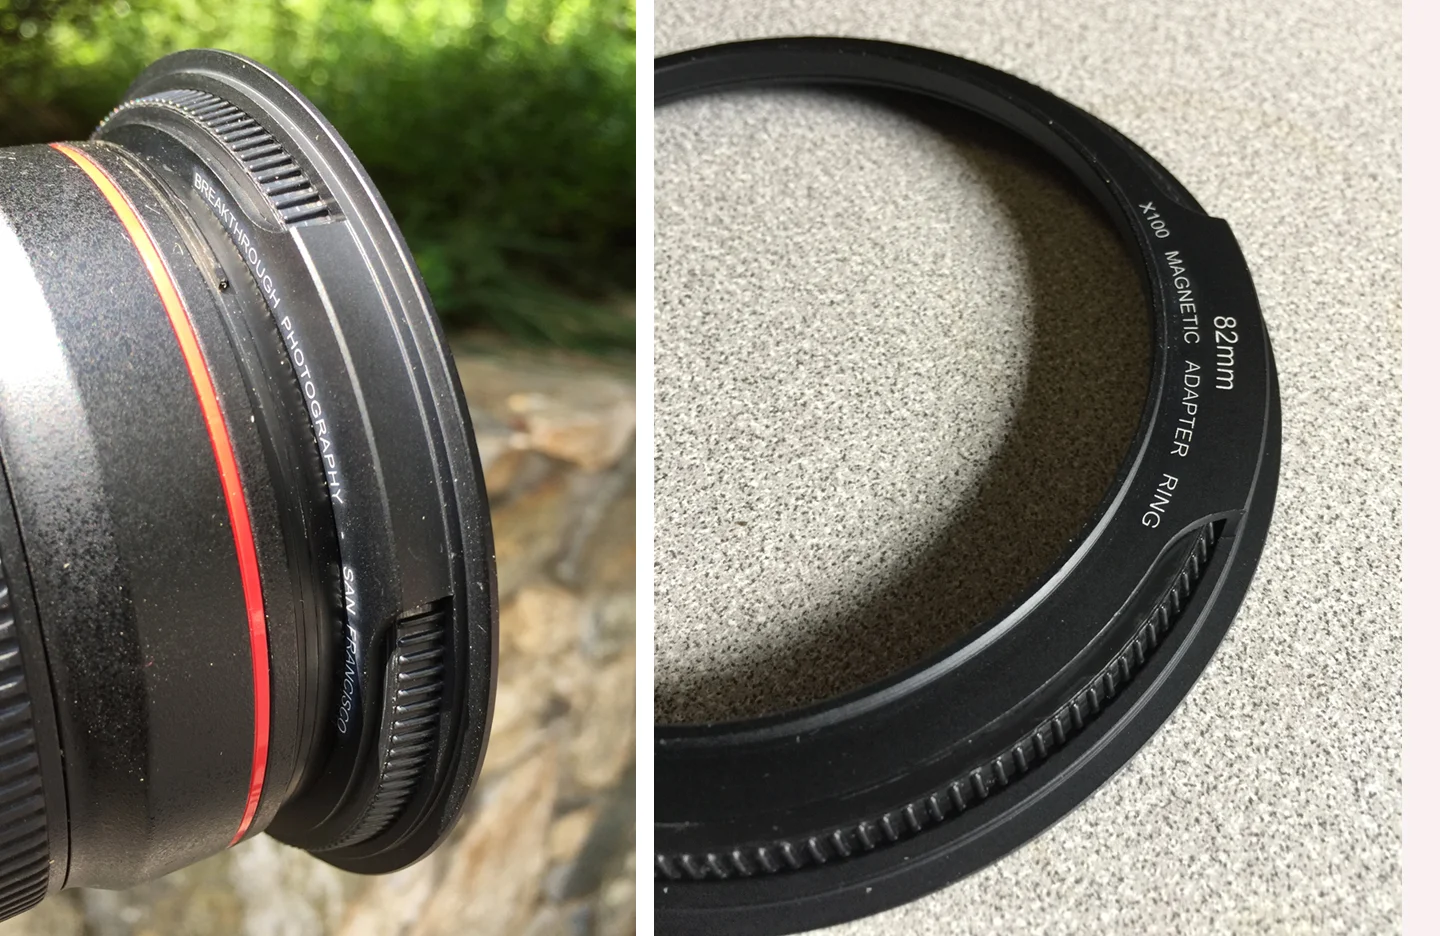
Check out the filter I am holding in the above picture. That's right. There are no filter threads - because it's magnetic. Kinda cool!

So you may be asking, "What's so cool about about a magnetic filter and a magnetic filter holder?" Well my friends, here's the answers:

1) Screw-in filters can get "frozen" in place and can be difficult, if not impossible, to remove – except by a pro service center or with a filter wrench.

2) Screw-in filters can get cross-threaded. 

3) Screw-in filters that are tricky to thread can slip out of your hand and smash on the ground. Seen that!

4) When photographing at night in cold conditions and while wearing gloves, it can be difficult to screw in a filter.

Screen Shot 2018-08-12 at 2.25.19 PM.png

For these reasons, and after testing the Breakthrough Photography Magnetic Filters, Magnetic Ring Prototype, Magnetic Wheel Prototype, and because Breakthrough Photography makes the best color-accurate ND filters, awesome polarizing filters, and a cool Night Sky filter, I've totally switched to their magnetic filter system. Here's a very quick look at the system.

IMG_9161.jpg

After you screw the Magnetic Adapter Ring (again I'm using a prototype) onto your lens, all the magnetic filters snap into place - and can be easily removed. Can you still "dial in" the amount of polarization once a polarizing filter is in place? Sure. Simply use the inner ring to choose the amount of polarization.

Here's a quick tip: When you travel, keep the filters in their original cases, and mark each case so you can easily choose the filter you need for a certain situation.

Screen Shot 2018-08-12 at 3.24.02 PM.jpg

Speaking of ND filters, if you want to get the blurred water effect when photographing in bright light, a ND filter is a must. Read more in my book, Evolution of an Image.

IMG_9186.jpg

Because I have Canon lenses with 82mm and 77mm filter diameters, I travel with two Magnetic Adapter Rings – each marked in bag so I can grab on the go and shoot fast.

Hey! If you like long exposures, Breakthrough Photography offers a e-free book on Long Exposure photography. Click the image above to order.

If you'd like to learn more about creative photography, check out my KelbyOne on-line classes.

Explore the light,
Rick

Landscape Photography - analyze this

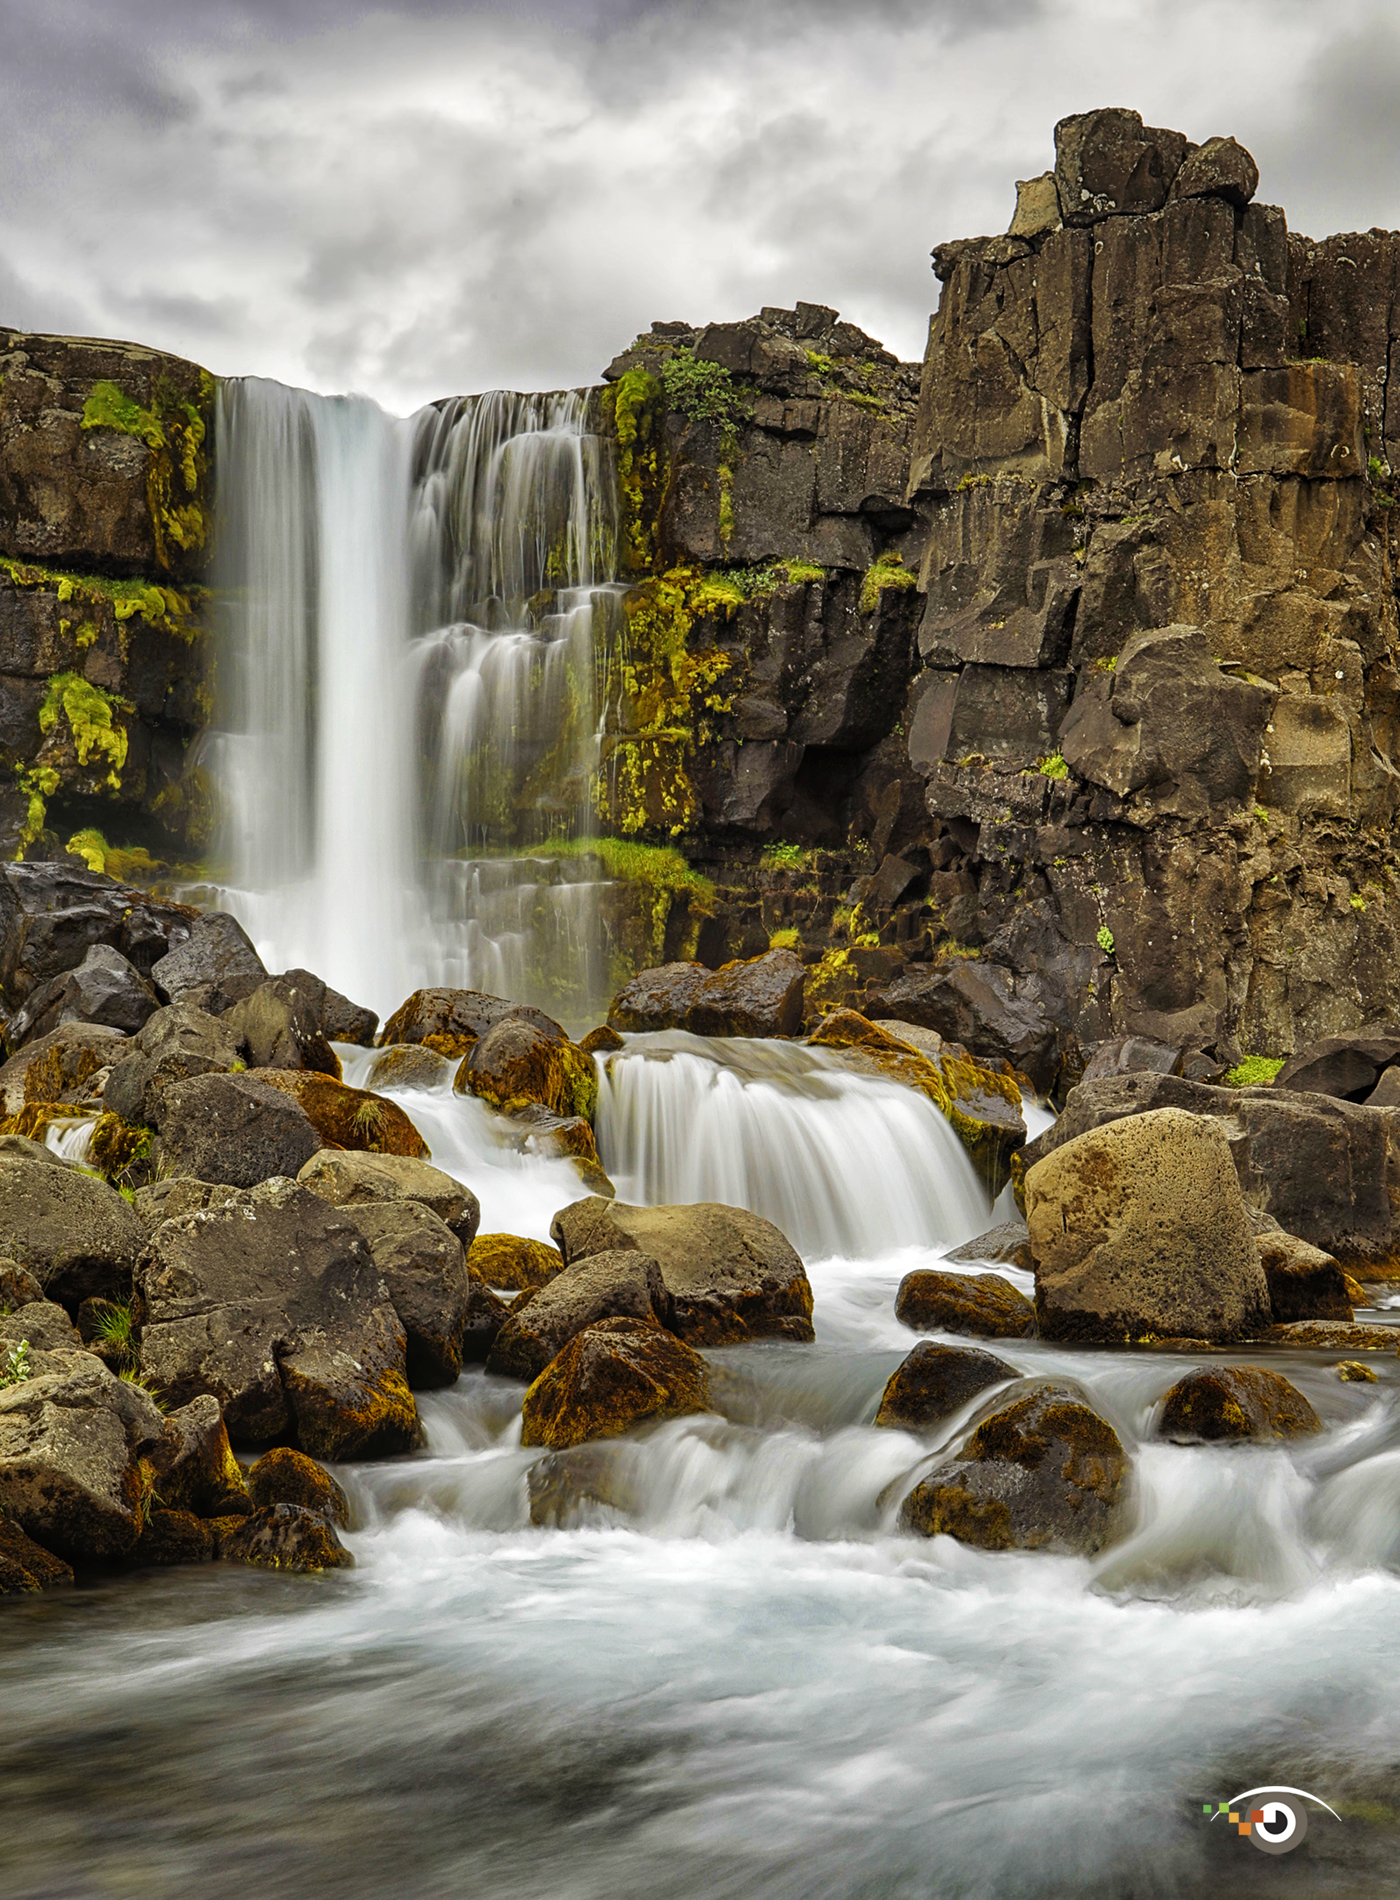
Above is a favorite Iceland image that I made in July with my Canon 5D Mark IV (pre-production model) and Canon 17-40mm lens – mounted on my Really Right Stuff tripod with RRS ball head.

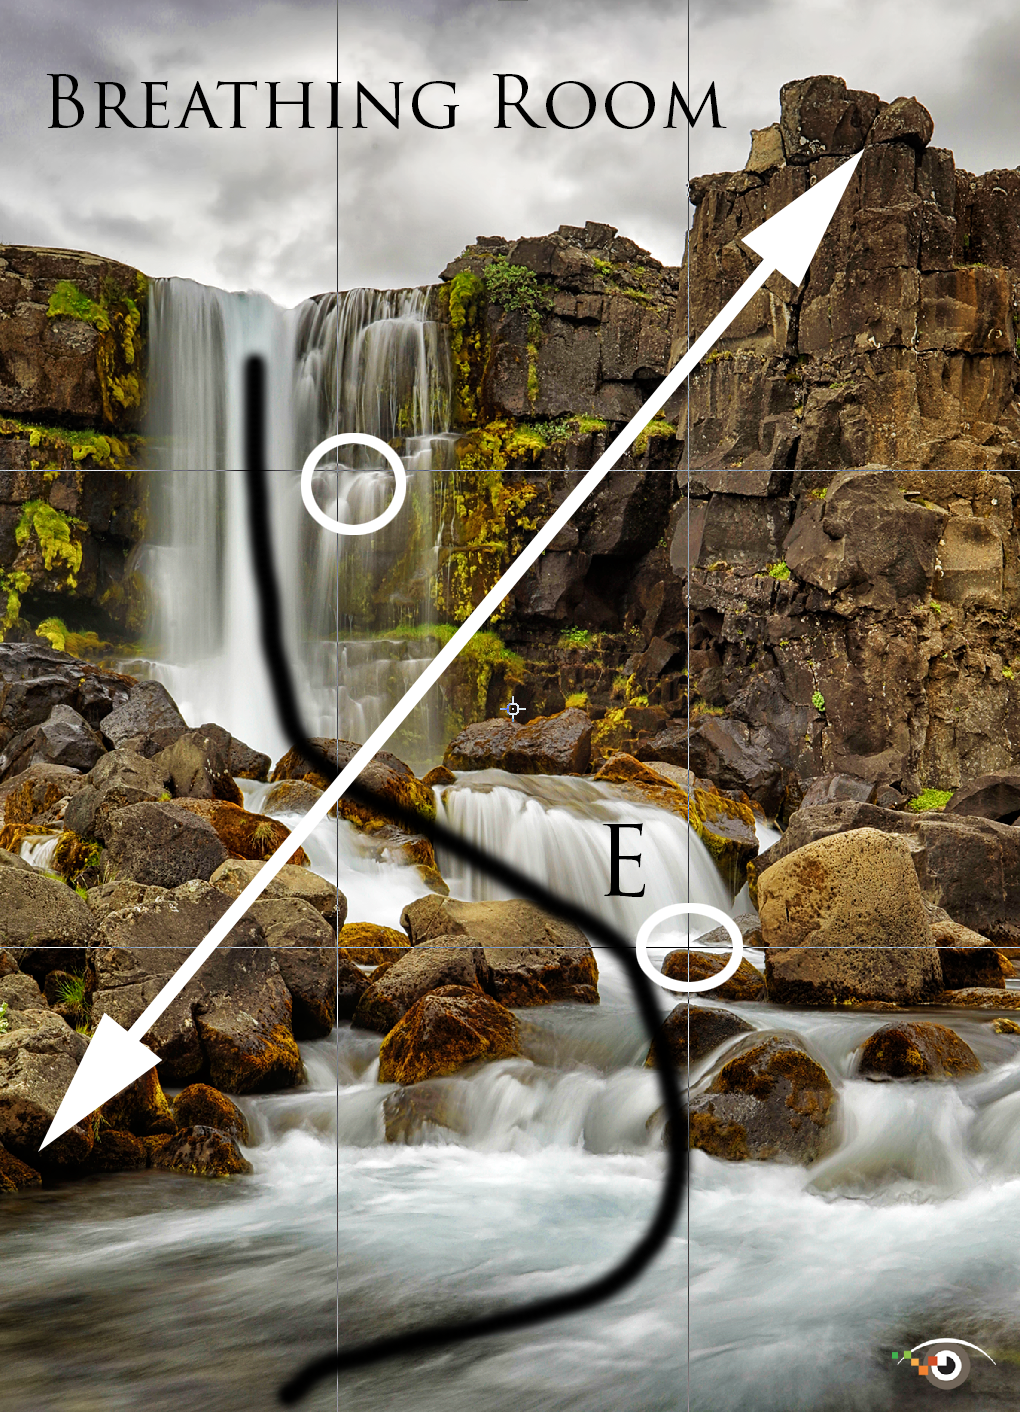
The image, with excellent detail in the both the shadow and highlight areas (thanks to the dynamic range of the 30.4 mega pixel image sensor), illustrates several basic - and important - photographic techniques, illustrated by the marked-up image below . . . which I composed using Live View (which I recommend to all my photo workshop students).

But first, take the time to analyze your images. The process will help you determine which are your very best photographs. Try it, you'll like it . . . I promise you.

1) The black line shows the movement of the water running through the image.

2) The corner-to-corner white arrow shows that everything in the scene is in sharp focus, a goal I try to achieve in all my landscape images. For max depth-of -field, use a wide-angle lens, small aperture and focus 1/3 into the frame. You can use the touch screen to focus!

3) The circles on the intersecting lines of the tic-tac-toe grid illustrate the "rule of thirds" composition technique. The two waterfalls are the main subjects.

4) The open area at the top of the frame illustrates breathing room.

5) The letter "E" is placed over the brightest part of the image. The tip here: expose for the highlights (by checking your histogram and highlight alert).

The image also illustrates an important tip for waterfall photography: Experiment with slow shutter speeds to get the desired effect - the degree to which YOU want the water blurred. Here I used a 1.3 second shutter speed.

For more on composition and exposure, see my latest book: Creative Visualization for Photographers.

Hey, if you are in the Costa Mesa, CA area on October 6, I hope you can come to my landscape and seascape photography seminar at the Canon Live Learning Center. Click here for info.

Explore the light,
Rick

P.S. FYI: the new Canon 5D Mark IV camera has a built-in GPS, so I can easily find this exact location when I return to Iceland. The full touch screen is also very cool. And, for photographing in Iceland, the improved weather sealing is most welcome!

My New Camera/Lens Combo for Landscape Photography

Click to enlarge image.

When it comes to landscape photography, one of my main goals, technically, is to get a super-sharp shot with everything in the scene in focus.

Helping me reach that goal is my new camera/lens combo for landscape photography: Canon 5DS and Canon 11-24mm lens.

Emotionally, my goal is to try to put the viewer in the scene, saying to himself or herself, "I'd like to be there," or "I'd like to be photographing in that location."

I took the above shot (actually an in-camera HDR image) in Croton on Hudson, New York, where I lead two Rick's Backyard Photo Workshops a year. They are listed on my 2016 Workshops page. We are about one-hour north of New York City.

Basic Landscape Photography Tips

Most of my landscape photographs, as well as seascape and scenic photographs, show the entire scene in focus. For maximum depth-of-filed, choose a wide-angle lens (the wider the better), set a small aperture (the smaller the better) and focus 1/3 into the scene.

To create a sense of three dimensions in a two-dimensional image, use a foreground element or elements. Shadows can also add a sense of depth to an image, as can photographing a subject from an angle (as opposed to straight on).

If a close foreground element and aperture combination don’t allow you to get everything in the scene in focus, you can use a feature in Photoshop called “focus stacking,” which lets you combine pictures taken at different focus points in to a single image in which everything is in focus.

When it comes to composition, placing the horizon line in the center of the frame is usually a no-no. With reflections, however, that can work quite effectively. But generally speaking, if the foreground is interesting, place the horizon line near the top of the frame, and vice versa.

Important filters for landscape photograph include a polarizing filter and a ND (neutral density filter). A polarizing filter can reduce reflections on water and foliage. It can also make a blue sky look darker and white clouds look brighter

A good tripod and a good ball-head are important for steady shots in landscape and seascape photography. I recommend Really Right Stuff tripods to all my photo workshop students.

Super serious photographers who want the sharpest possible image (least amount of camera shake) always mount their camera on a study tripod, use the mirror lock-up feature on the camera, and release the shutter with a cable release, self-timer or app – even in bright light.

I hope to see you in Croton on Hudson someday! It's a great place to photograph, and to learn about photography.

PLJ,
Rick Sammon
Canon Explorer of Light since 2003

For more tips on getting super-sharp shots, check out my latest book, Creative Visualization for Photographers.


Casper "Old West" Photo Workshop Roundup: We made "not specializing" our "specialty"

Howdy Pardners,

I'm just back from my Old West Photo Workshop in Casper, Wyoming – organized by my friends at Wyoming Camera Outfitters. What fun we had making pictures, processing our images and making new friends. That's the way we do it on all my workshops.

Here's my roundup – photographs and tips – from the workshop. As you will see, I taught several different photo specialties: working with models (and horses), indoor lighting, composition, HDR imaging, action shooting, creative composition and landscape photography. We also covered image processing in Lightroom and Photoshop, as well as working with plug-ins.

As I told the workshop participants, "My specialty is not specializing. Try it, you'll like it!" Yes, they took my advice and all did a great job!

Okay, let's check out some images and tips.

Above: Wonder Bar. Canon 5D Mark III, Canon 35mm f/1.4 lens. I used fast lenses in the Wonder Bar because I was shooting in relatively low light. Lighting: Three Westcott Spiderlites in soft boxes (diffusion panels removed for maximum illumination). Tip: Light the eyes and focus on the eyes, even when taking wide-angle shots. As a general rule, if the eyes are not well lit and in focus, you've missed the shot . . . unless you are looking to create a sense of mystery in the photograph, in which case the eyes can be hidden or closed.

Above: That's me shooting. We positioned the Westcoot Spiderlites, left and right, for fairly even lighting. A third Spiderlite was positioned off camera at the rear of the bar to partially illuminate the background. Photo: Carol Vipperman.

Above: Wonder Bar. Canon 5D Mark III, Canon 28mm f/1.8 lens. Same Westcott lighting set-up as in the previous behind-the-scenes image. Tip: Look for separation when you compose an image. Notice how all the models – and the horse – are separated.

Above: Wonder Bar. Canon 5D Mark III, Canon 70-200mm f/4 lens. Same Westcott lighting set-up that was used for the opening image in this post. Tip: Remove some of the reality from a scene by removing the color. When you remove the reality, an image can look more creative and artistic.

Above: Behind-the-scenes shot showing the lighting for the previous photograph. Tip: Set up your lights and leave them be. Then, move different subjects into basically the same position. That technique cuts down on the number of variables in making a photograph. Photo: Susan Sammon.

Above: Wonder Bar. Canon 5D Mark III,  35mm f/1.4 lens. Natural light. Tip: See eye-to-eye and shot eye-to eye – so that the person looking at your photograph relates to the subject.

Above: Wonder Bar. Canon 5D Mark III, Canon 35mm f/1.4 lens. Natural light and Westcott Flex daylight-blanced LED Light Panel. Tip: Balance natural light with added light to make a shot look like a natural light shot.

Above: This behind-the-scenes shot shows the making of my "Cowgirl with Guitar" photograph. The Westcott Flex daylight-blanced LED Light Panel was positioned to illuminate the subject's face. Photo: Susan Sammon.

Above: Fort Casper. Canon 5D Mark III, Canon 24-105mm IS lens. Lighting: Rick Sammon Light Controller and Tote (which features a reflector and diffuser) by Westcott. Tip 1 (left): Use a reflector and/or diffuser to compress the brightness range of a scene. Tip 2 (right): Get the subjects involved in the shoot - and the fun.

Above: That's Canon's Cal Ellis (left) helping me control the light for the workshop students. Photo: Susan Sammon.

Above: Fort Casper. Canon 5D Mark III, Canon 70-200mm f/4 lens. Tip: Pay attention to shadows. Shadows are the soul of the photograph.

Above: Canon 5D Mark III, Canon 70-200mm f/4 lens. ISO 10,000. Tip 1: Shoot for the peak of action. Tip 2: Don't be afraid to boost your ISO. It's much better to get a sharp shot with a bit of noise than a blurry shot with little noise. One of the reasons I use the Canon 5D Mark III is the relatively low noise at ISO settings. When I have noise, I reduce it with Topaz DeNoise, listed on my Save on Plug-ins page.

Above: Junkyard outside of Casper. Canon 5D Mark III, Canon 14mm lens. Seven-stop, hand-held HDR image processed in Photomatix. Tip 1: Want to master HDR? Learn how to shoot from inside to outside - where the contrast range is extreme. Tip 2: Process your HDR images in Photomatix. Click here to get a discount on Photomatix. 

Above: Junkyard outside of Casper. Canon 5D Mark III, Canon 14mm lens. Seven-stop, hand-held HDR image processed in Photomatix. Tip: Have fun with HDR!

Above: Junkyard outside of Casper. Canon 5D Mark III, Canon 24-105mm IS lens. Tip: Detail shots help to tell the story of a location.

Above: Backwards Distilling Company. Canon 5D Mark III, Canon 24-105mm IS lens. Tip: Before you set up multiple lights, see what you can do with one light. The photograph above is a one-light photograph. To soften the image, I applied the Duplex filter in Nik Color Efex Pro.

Above: One of the advantages of using a constant light is that you can see where the shadows fall before you shoot. Tip: If you want an interesting portrait, don' light the entire subject.

Above: Backwards Distilling Company. Canon 5D Mark III, Canon 24-105mm IS lens. Tip 1: When using mirrors, the background can make or break a shot. Tip 2: Focus carefully. Here I focused on the model's reflection in the mirror.

Above: Our simple lighting set-up for the previous photograph. I positioned the light for maximum illumination of the subject's face.

Above: Backwards Distilling Company. Canon 5D Mark III, Canon 24-105mm IS lens. Tip: When it comes to composition, try this technique: The name of the game is to fill the frame. Of course, dead/negative space works, too. Learn more about composition in my KelbyOne class, Composition, the strongest way of seeing.

Above: That's my friend Dinty Miller, owner of Wyoming Camera Outfitters, assisting with the lighting. Like all the model shots taken at the Backwards Distilling Company, we used only one light to illuminate the subject.

Above: HDR at the Trailside. Canon 5D Mark III, Canon 14mm lens. Tip: Make sure you capture the entire dynamic range of the scene when shooting HDR sequences. I needed seven exposures (three stops over and three stops under the average setting, in addition to the average setting) to capture the entire dynamic range of this high-contrast scene. Note the bright sky in the left of the frame. This image was also processed in Photomatix.

Above: Sunset on the range. Canon 5D Mark III, Canon 24-105mm IS lens. Tip: When the sky is interesting, place the horizon line at the bottom of the frame, and vice versa.

Above: Late afternoon landscape. Canon 5D Mark III, Canon 17-40mm lens. Tip: Use foreground elements to draw the viewer into the scene. For more landscape photography tips, check out my on-line class: Master Landscape and Seascape Photography.

Above: Range rider. Canon 5D Mark III, Canon 70-200mm f/4 lens. Tip: Use AI servo focus (focus tracking) when photographing fast-moving subjects.

Above: Freemont Canyon. Canon 5D Mark III, Canon 24-105mm IS lens This is one of my favorite reflection images from our Freemont Canyon shoot. Tip: When it comes to reflections, it's OK to place the horizon line in the middle of the frame.

Above: Freemont Canyon. Canon 5D Mark III, Canon 24-105mm IS lens. Tip: Shoot close-ups of reflections, too. They make interesting abstracts.

Speaking of reflections . . . It's fun reflecting on the comprehensive (and intensive) workshop. It was not only a rewarding photographic experience, but a wonderful personal experience. I feel as though I have made new friends, for life. I will miss them all – until we ride again.

I hope to see you someday on a workshop

Shoot me an email if you are interested in my 2016 Caper workshop.

Explore the light,
Rick

What’s New?

My 36th book: Creative Visualization for Photographers.

... and

My on-line learning center, where you can download my e-books, including, Get Motivated and Stay Inspired.