Learn About Light in Death Valley with Light

cover?.jpg

Light - it's the main element in every photograph. As photographers, we need to learn how to see  the light, control the light, expose for the light and process the light. Having fun with light is important, too.

You will learn all that - and much more - on the February 2015 Digital Photography Landscape Photography/Model Shoot Workshop that I am co-leading with my friend Hal Schmiit, director of Light Photographic Workshops.

You'll find info on our Death Valley workshop my 2015 Workshops page.

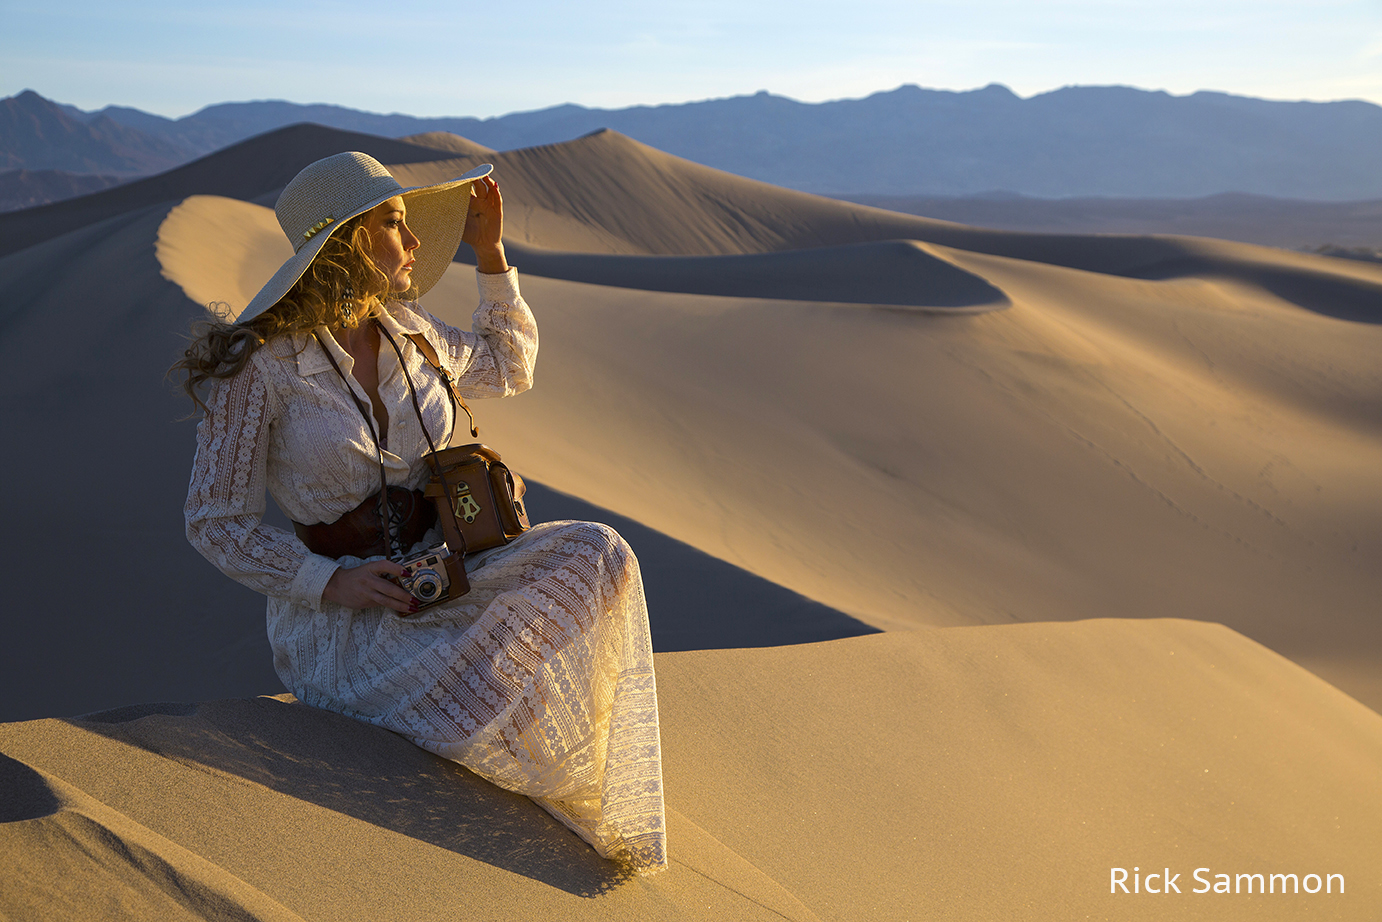
The opening photograph for this post is my favorite image from this year's workshop. The image below is a behind-the-scenes shot taken by Hal at the moment I took that photograph. That's me on the far right.

Photo info:  Canon 5D Mark III camera and Canon 24-105mm IS lens. Also: Tiffen polarizing filter and Black Rapid strap.

Below you'll find cut-and-pasted previous posts I've written on my Death Valley workshops. Hal and I hope you can join us on the dunes and at the other cool locations in Death Valley in 2015. Space is limited.

Shooting Tips

• Work with shadows and highlights to create dynamic images.
• Expose for the highlights.
• Think HDR in high contrast situations.
• We need to get up early to get on site before the dunes are filled with fresh footprints and other photographers. We'll car pool from the ranch.
• Yes, we will be on the dunes before sunrise, but the light will be very flat. As soon as the sun comes up, the contrast, light and colors are awesome. You may not want to lug a tripod into the dunes, which are about a  20-minute or longer walk from the road. If you do bring a tripod, be very careful not to get the joints packed with fine sand. I've been to the dunes for sunrise three times and have not used a tripod . . . but it's up to you.
• Bring your head-mounted flashlights (and extra batteries) on our sunrise shoots.
• It can get windy on the dunes. Bring plastic bags or camera covers to protect your gear.
• Bring water! Don't forget your water bottle.
• Be very, very careful when changing lenses on the dunes. Sand is your enemy.
• Travel light on the dunes. Maybe just bring a wide-angle and tele-zoom. Fish-eye, too.
• If you put your backpack down in the sand, be very careful about . . . that's right - the sand!
• Plan to shoot panos. The long image above is a four-shot, hand-held pano.
• Pack your polarizing filter.
• Be ready to have your hiking boots and shoes filled with fine sand.
• Wear a hat and sunsceen.
* Getting to the top of some of the sand dunes is not easy. You need to run up fast in the sand. Hal and I will be there to help. But to get to the top of the dunes, you need to be in good shape.

My Recommended Gear List

Canon 5D Mark III
Canon 15mm lens (my lens) or Canon 8-15mm lens (getting it soon) - for fun fish-eye shots.
Canon 14mm lens - for an extremely wide view.
Canon 17-40mm lens - my basic landscape lens.
Canon 24-105mm lens - for closer views in landscape photography.
Canon 70-200mm f/4 lens - to isolate elements in a landscape.
Canon battery chargers - so I have power.
Arctic Butterfly - for cleaning my sensor.
Tiffen Polarizing filter - to darken the sky and to whiten clouds.
Lexar 16GB cards - for recording your memories.Induro CT 214 tripod
Induro BHD1 ball head
MacbookPro loaded with Photoshop, Lightroom and all my plug-ins.
Head-mounted flashlight and hand-held flashlights - for seeing in the dark.
Lexar card reader - for fast downloading.
Lacie 500GB portable hard drive - for storing my images.

25 Tips That Apply to the Opening Photograph

1 Never underestimate the importance of a good subject.
2 Never underestimate the importance of a good location.
3 Watch the background.
4 Expose for the highlights.
5 Focus on the face.
6 Pay attention to light on the face.
7 Shadows are the soul of the picture.
8 Props Rock.
9 Composition is the strongest way of seeing.
10 Play with plug-ins.
11 Direct the subject.
12 Frame the face.
13 Separate the subject from the background.
14 Chase and catch the light - you snooze you loose.
15 Placement of the horizon line is important.
16 Burn and dodge carefully.
17 Cropping gives us a second chance at composition.
18 Be prepared with the right lenses.
19 Don't skimp on a filter.
20 Master technique, but.... (see number 21)
21 The most important thing about a picture is the mood/feeling.
22 Make pictures, just don't take pictures.
23 Explore the light.
24 Have fun!

Find the Best Light

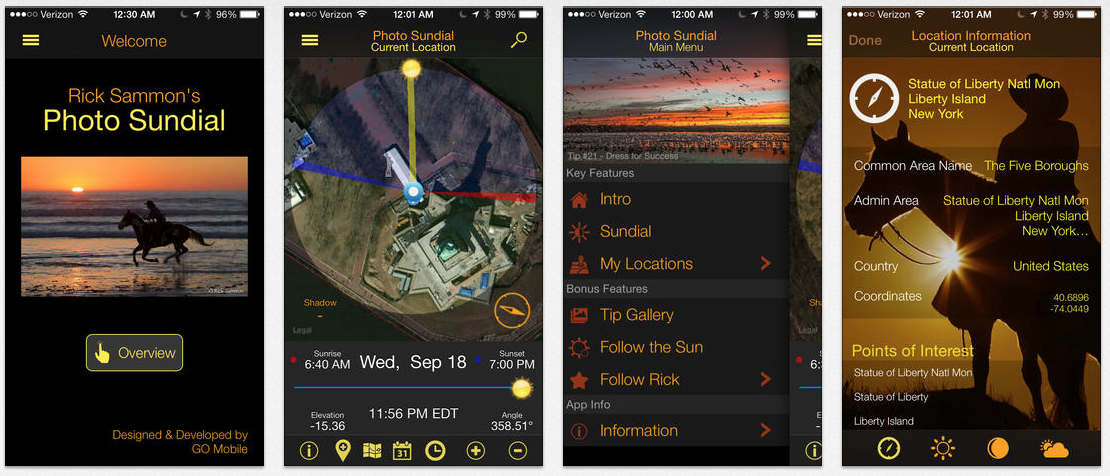
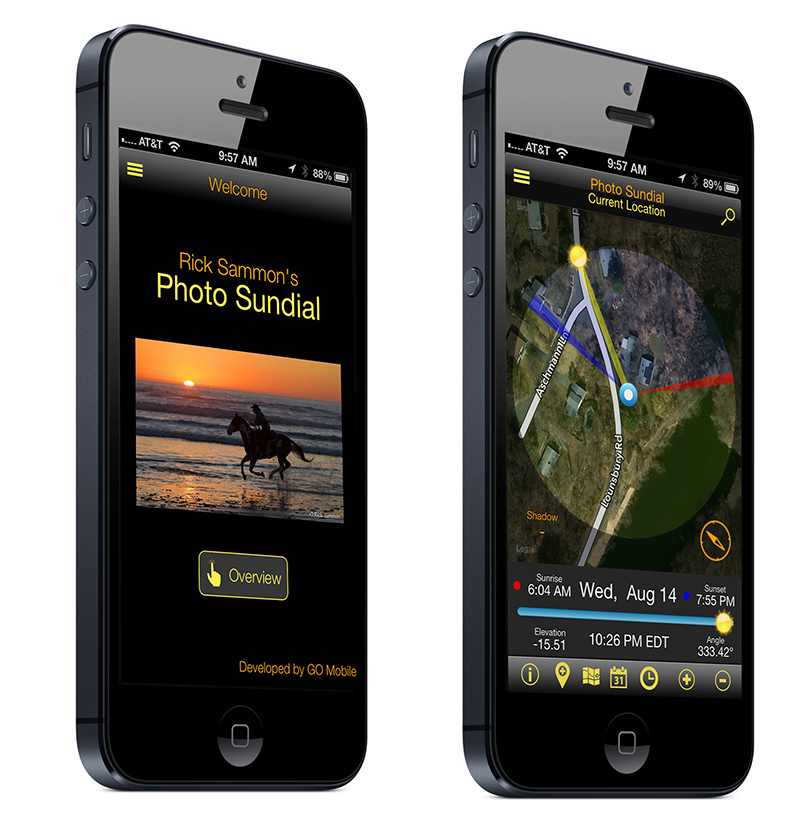
To help you find the best light - on all your worldwide travels - check out my latest app, Rick Sammon's Photo Sundial.

The app show you exactly where the sun will rise and set, as well as its position throughout the day. It also includes my best tips for photographing at sunrise and sunset. Other features include: Location Search, Weather, Moon Phases, Directions, Location Sharing.


If you can't make a live workshop, check out my on-line workshops.

Explore the light,
Rick

Save 50% On Topaz Clean - until May 31, 2014

Check out Topaz Clean and save 50%. Cool Features:
* Smoothness: smooths the surfaces of your photo. Useful for removing blemishes from skin, removing dust + noise, creating a "flatter" texture, and more.
* Edges: smoothly enhances edges with a unique process that looks "vectorized". This creates smooth and well-defined lines in your photo that work great on image features like hair and eyelashes.
* Texture: recovers and refines original detail in your image to keep it looking natural. For example, re-introduce original skin texture in your portraits to prevent your post-processing from looking too overdone or "plastic".

Click here to order.

50% off sale runs May 8 to 31 when you use this code: mayclean

All the plug-ins I use are listed on my Play & Save on Plug-ins page

Explore the light,
Rick

Learn About Composition & Light On My Workshops and On-Line

Composition is the strongest way of seeing. The main difference between the opening image for this post and the image below is composition. The picture below is a composition mess.

The opening photograph illustrates an important composition technique: separation between the elements in a scene. Most of the time, separation is a good thing.

Composition is important, but so is light. Light, after all, is the main element in every photograph, so we need to learn how to see and capture the light. The two elements that make this photograph pleasing are a good exposure and nice light. My # 1 lighting tip: expose for the highlights.

I teach composition and getting a good exposure on my workshops.

If you can’t make a workshop, check out my KelbyOne on-line training classes on composition and light.

To help you find the best light, anywhere around the world, check out my latest app, Rick Sammon's Photo Sundial. The app also includes my best tips for photographing at sunrise and sunset. Weather and phases of the moon info is included, too.

FYI: I made these photographs this past weekend in Alaska while co-leading a photo workshop with my good friend Hal “Bull” Schmitt, director of the Light Photographic Workshops.

Hal and I are co-leading a Death Valley Photo Workshop in 2015. Join the fun in the sun? The workshop will focus on landscape photography, model photography, HDR, Lightroom and Photoshop.

Explore the light,
Rick
 

Today's Awesome Guest Blogger: Jeff Clay

I’ve been an admirer of Rick for some time and when the Wasatch Camera Club brought him out to Salt Lake City to speak as part of Canon’s Explorers of Light program, I had a chance to talk one-on-one with him.  At the end of our hour or so he graciously extended the offer to me to guest blog and for that, and his wonderfully received presentation, I thank him!

One of the things that Rick discussed at our presentation was the role of luck in photography. This resonated with me as I call it the serendipity factor.

Above: The image entitled North Window Sunrise is one of my prime examples. An early cold Halloween morning found me at Arches National Park with the goal of shooting Turret Arch through North Window Arch. It’s a classic shot (if you don’t know what I am writing about, Google that phrase), perhaps overdone, but I wanted it anyway. To get it one clambers through North Window, climbs up a ledge and waits for the light. When I got there – early as it was – there was one person on the ledge and another making his way up. I do not like cheek-by-jowl photography so resigned myself to shooting first light on the “wrong side” of North Window. As the light touched the top of Turret Arch I shot several images and then turned around to look through the arch and towards the just rising sun. Hallelujah! This was the shot, courtesy of serendipity! (This was early in my HDR career so I captured multiple sets of only 3 exposures and processed with Photomatix. If I were to reshoot this now, 5-bracketed exposures would likely be the minimum.)

[Note from Rick: Readers can save 15% on Photoshop on the Play & Save on Plug-ins page.]

For almost 10 years I have been exploring cityscapes and landscapes with infrared cameras. Starting first with screw-on filters for IR sensitive point-and-shoots, several years ago I began converting DSLRs to infrared-only by having the appropriate filter installed over the camera’s sensor. The images that are captured in the infrared spectrum can be quite extraordinary. Literally things you can’t quite see, become revealed. Contrast, tones, texture, and the interplay of shadow and light dominate.

Above: This image of Early Morning, Mesquite Sand Dunes shows all of these: the almost razor-sharpness of the sand dune ripples, the dance of the light and dark areas, the tones of silvery grey in between and the bright-white, “woods effect” of the creosote bush. Generally, all of my IR images are converted to B&W with Nik Silver Efex Pro. I increase contrast and structure and often will shoot multiple exposures with the idea of blending them in Photomatix. Infrared dynamic ranges can be quite narrow.

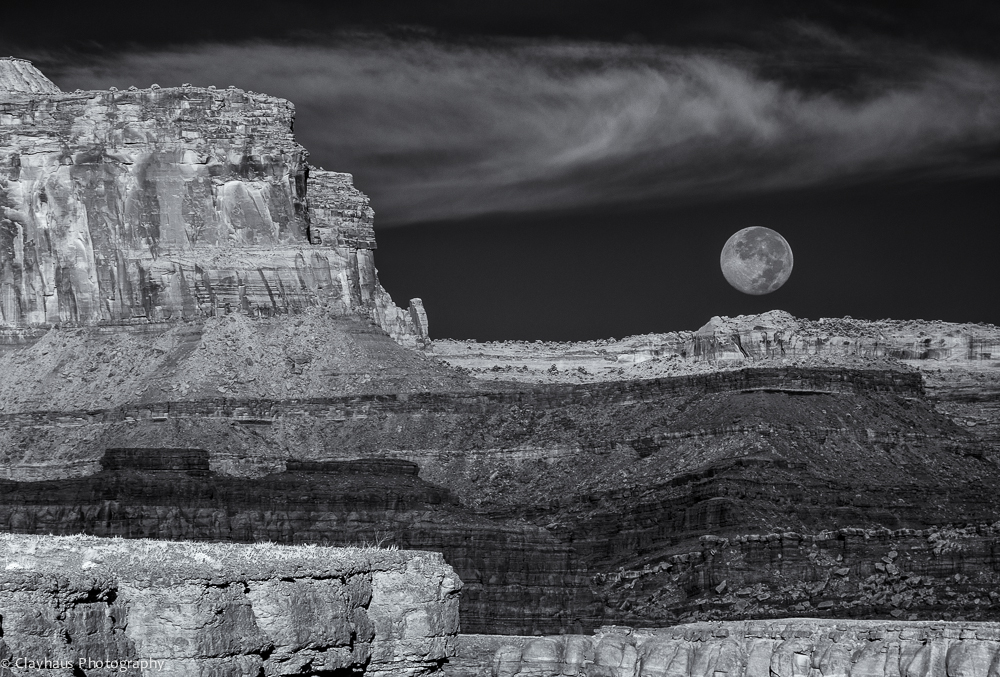
Above: Moonset over Island in the Sky is a good example of the power of exposure blending of infrared images. Three captures at shutter speeds of 1/15, 1/45 & 1/25 at a focal length of 200mm (tripod required for this shot!) yielded pretty flat images. But once blended and processed with Silver Efex Pro a very sharp, layered image with wide tonalities emerges.

The last couple of years I don’t travel anywhere – whether in the Southwest, NYC or overseas – without a number of Neutral Density filters. I love the effect of blurred water or clouds. It’s also a good way to make people disappear from an otherwise crowded scene.

Above: I photographed this composition of Gjáin Falls (in Iceland) five times at exposures ranging from 1.5 seconds to 20 seconds. Don’t just settle on one exposure and move on. I have found that looking at the light, the way the water flows down falls and over submerged (or not) rocks, and the general image composition tends to determine the best exposure times.  This image was on the longer side – 20 seconds – and after processing with Lightroom, Photoshop and the almost-always-used Nik Color Efex Pro yields a colorful and detail-rich photograph. The sky was grey and overcast so note the inclusion of little of it. I usually carry three ND filters: B+W ND 1.8 (6 stops), Hoya NDX400 (9 stops), and for really bright days, B+W ND 3.0 (10 stops).

Huge vistas such as provided at Dead Horse Point in Utah can make for some fantastic – or very boring – imagery. The lack of clouds and/or foreground interest can kill an otherwise interesting landscape.

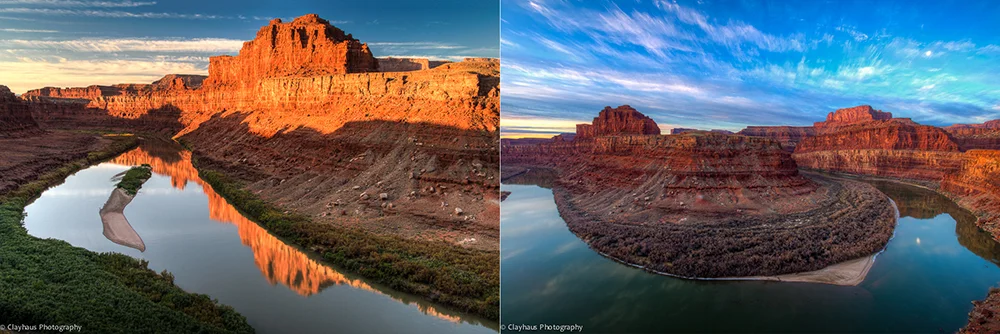
Above: I often prefer to be in the landscape rather than above it as this two-shot montage of the Gooseneck of the Colorado River shows (a thousand feet below Dead Horse Point). The first image was taken in October and the second, captured in almost the exact same location, was photographed two years later in January. The light is obviously very different but also note how different the reflections are. In October I had boring skies but a beautiful reflection of the Gooseneck cliffs themselves. I focused in relatively tight (24mm) and the image is all about the warmly glowing rocks above and mirrored below. For the second image I used a very wide angle (10mm) to capture the pastel clouds coolly glowing in the dawn light. The reflection of the cliffs (and waning moon) is secondary to the larger landscape view.  This was a triple exposure blended in Photomatix and the longest shutter speed was 1.3 seconds, yielding soft clouds, which added to the overall intended effect. The first image was also processed via Photomatix.

Above: My last image – NYC Pano –  is a landscape of a decidedly urban nature. Again using an infrared-converted camera, this is actually a four shot, hand-held panorama taken on the Staten Island Ferry as it is plowing its way across New York Bay. IR really brings out the clouds in this view that stretches from Jersey to Brooklyn. I do a lot of hand-held panoramas (and vertaramas as well) – including utilizing bracketed exposures – and surprise myself at how well I can swivel at my hips whilst keeping my upper body erect. Nothing beats the use of a tripod for panos or bracketed exposures – and I almost always carry one – but frankly I often don’t want to take the time and it is impressive how accurately software is able to align images. Ninety-plus-percent of my panoramas are stitched using the “Reposition” setting in Photoshop’s’ Photomerge function.

I hope you have enjoyed this brief excursion down my photographic lane. If you want to see more of what and how I shoot – or want to send any questions or comments – please visit my website.

And again, a big thanks to Rick!


Goodbye HDR! Hello EDR?

1 © Rick Sammon.jpg

Goodbye HDR! Hello EDR?

Digital HDR (high dynamic range) photography has been around for years. Before digital HDR, film and wet darkroom photographers, including Ansel Adams, created HDR-like images by using various techniques – including, but not limited to, burning and dodging.

I've always liked a good HDR image, mostly where the image does not look as though it was processed with an HDR program such as Nik HDR Efex Pro and Photomatix - the two HDR programs I use to create images that don't look like HDR images . . . if that makes sense.

Info on those programs, both of which I teach, is on my Save on Plug-ins page. 

HDR, as you may know, has gotten a bad rap. Do a Google search on "I hate HDR" to see what people are saying. (As an aside, I had a bad wrap a few weeks ago at a roadside deli. The tortilla was soggy, as was the lettuce.)

2 © Rick Sammon.jpg

Recently, someone said about my work, "He's overly fond of HDR." Perhaps that's because I teach HDR, in addition to teaching natural light photography and speedlite photography, on my workshops. Or maybe it's because I have an HDR app - iHDR. That's only one of my 12 apps. Most of my apps feature straight, non-HDR shots.

Fact is, I only shoot HDR about 10 percent of the time. Anyway . . . .

I still like  HDR - the shooting part and the processing part. Mostly, my goal these days is to create an image that does not look like an overly processed, or "over cooked," image. That said, I have been known to go over-the-top when it comes to HDR. That was, and is, good fun.

3 © Rick Sammon.jpg

Because HDR has such a bad rap, I thought I'd change the name of my HDR images to EDR images. EDR stands for Extended Dynamic Range.

To bring out the detail in that top left scene, HDR shooting and processing was needed to create the image on the top right. By the way, we shoot at this temple on my Rick's Backyard Workshop, which is a ton of fun.

© 6 Rick Sammon.jpg

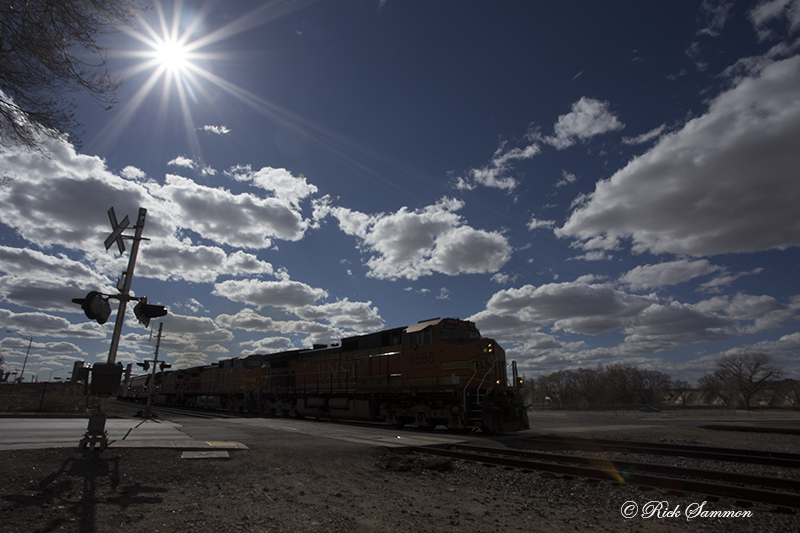
Even the opening  image for this post is an EDR image. I created it in Lightroom by cropping and then by adjusting the Shadows, Highlights, Contrast, Exposure, Whites, Blacks, Clarity and Saturation . . . and then by making it a black-and-white image. The train was moving fast when I took the shot. So I guess you could say this is a one-shot HDR image, but now I'm calling it a one-shot EDR image.

4 © Rick Sammon.jpg

By the way, many of my fellow pros are now using Lightroom and Adobe Camera RAW to create HDR, oh I mean, EDR images. It's amazing how, with these programs we can open up shadows and tone down highlights to create EDR images. So much so that you don't need to shoot and process HDR in medium contrast situations.

5 © Rick Sammon.jpg

In extreme lighting situations, such as the one above, a series of images is needed and processing in an HDR program is required.

©  rick sammon.jpg

Above is also an EDR image that I made in Iceland. It's a JPEG HDR, with a bit of tweaking, of three RAW files that I took with my Canon 5D Mark III, which has built-in HDR. My tweaking included using the Detail Extractor filter (which I call the HDR simulator filter in Nik Color Efex Pro).

rick sammon.jpg

So whatta ya think my friends? Should we replace the term HDR with EDR? Hey, maybe I could write another book or do another app!

In reality, it really does not matter what we call HDR/EDR. Because what's in a name?  Art is art and a photograph is a photograph. My guess is that not many people asked Ansel Adams, "How much burning and dodging did you do on that image?"

Leave a comment here in the Comments if you'd like. I'd like to hear from you. 

FYI: When I first heard about HDR and saw some cool HDR images, I thought HDR stood for High Do-it-Yourself Rockin' Images. :-) 

Explore the light,
Rick

rick sammon camargue horses 8.jpg

P.S. When it comes down to it, I think I like photographing people the most. Check out my World Portraits gallery to see some of my favorite images. However, my favorite recent photograph is this one of several Camargue horses running toward me at top speed.